Pages

Showing posts with label Pinterest Crafting. Show all posts

Thursday, July 3, 2014

Pinterest Crafting: Happy Birthday America!


Welcome back to another monthly installment of Pinterest Crafting! It has definitely been quite a few months since I've created any projects that wasn't card- or scrapbook-related. (See my previous months' Pinterest Crafting posts here and here.)

I chose a project that would be relatively easy, because, let's face it, I've been a little absent from my blog and the last thing I need to do is tackle a project that will overwhelm me and have me running for the hills, swearing off blogging forever. So, something easy. Check.

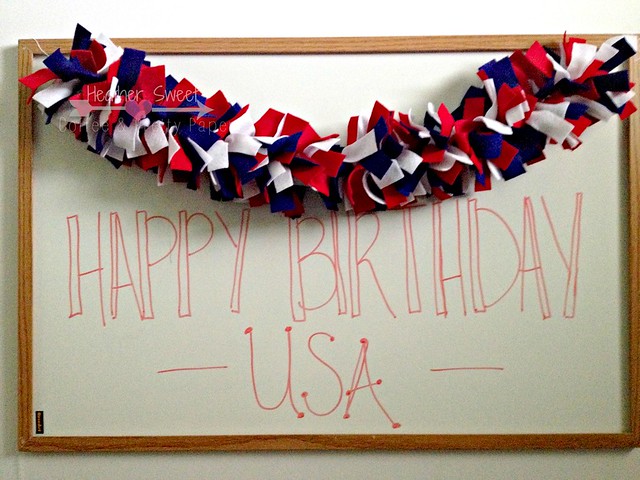
When I was writing out my July blog schedule (isn't a schedule such as this called an editorial schedule?), I wanted to incorporate an American theme craft. I also wanted to stay away from a paper craft project, since that's what this blog is mostly about. I found this pin (and her corresponding blog post) a few months back. I knew back then, I was definitely going to feature this on my Pinterest Crafting series.

Felt Garland

Now, I had to take these photos at work, with not much light (what is it about office buildings and minimum light?), AND on an overcast day. I really, really NEED a DSLR....

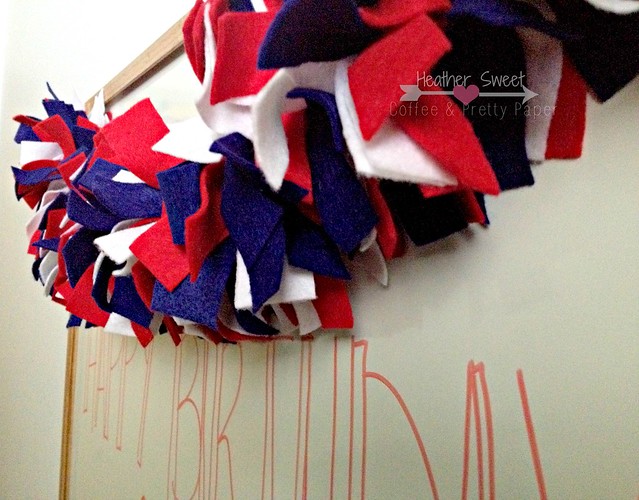
This felt garland is insanely simple to make. It's one of those mindless projects that can come together while binge watching shows on Neflix (I know I'm not the only one to do that).

Here are the supplies:

Supplies

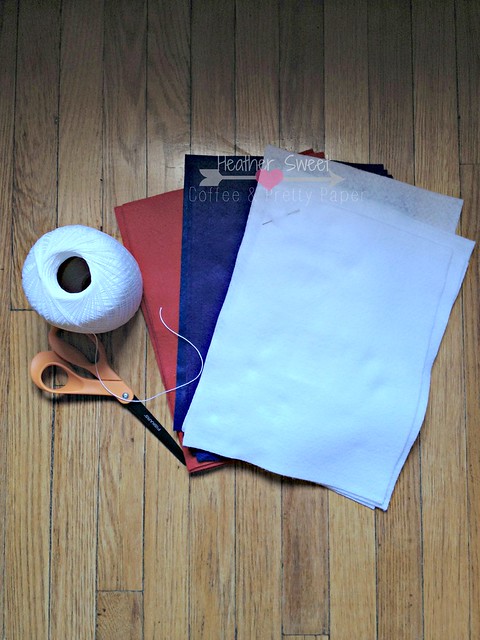
I purchased this felt a few months ago from Hobby Lobby. It's the default 9"x12" sheet of felt. I used crochet thread for it's strength, an embroidery needle, and scissors. That's all you need! Now, to make the strips of felt, I cut the felt sheet in half to make TWO 9"x6" pieces. I then processed to cut 1/4" strips (1/4"x6" strips). I eyeballed the width of the strips, but you'd want approximately a quarter- to a half-inch wide strips. When you string these bad boys onto your twine, thread, etc, make sure to fold the strip in half LENGTH-WISE before poking it with your needle to string them on your twine. Doing this gives the garland it's body or "fluff."

Felt Garland Close-Up

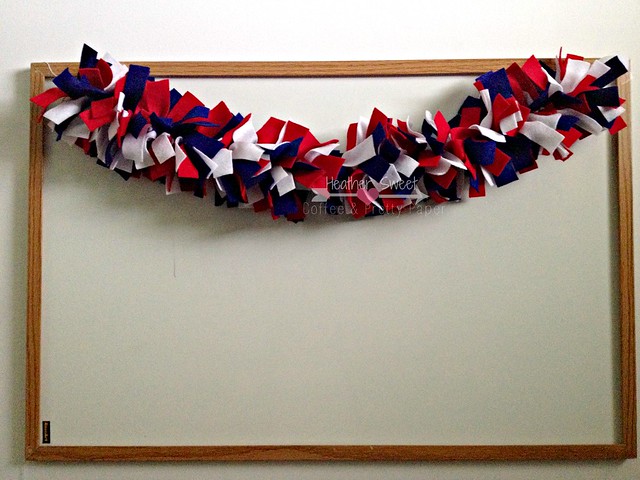
This felt garland is a quick and easy piece to add as party decor, to scrap rooms, to kids' rooms, as a holiday decoration, etc. It's all about the color felt you choose. When Mr. Sweet and I move and I have my own scrap area, I'll definitely be making a couple of these guys to brighten up my space.

Felt Garland

If you have any questions about this project, let me know in the comments section! Now that I've shared my red, white, and blue project with you, what is your red, white, and blue project? Let me know below!

xoxo,
Heather

Saturday, February 15, 2014

Pinterest Crafting: Foam Stamps


I'm back this month with another Pinterest craft!  If you're just now tuning in to my blog, my Pinterest Crafting series is a monthly series where I create a craft found on Pinterest.  I let you all know what I did, how I did it, if it worked, etc.  There have been a few times in the past where I've tried to recreate a project found in the DIY/Crafts section that just didn't turn out as well as the original post and/or pictures showed.  This is my personal journey to see what works, what doesn't, and how some projects can be re-vamped. 

I cannot wait until it gets a little warmer out so I can do some fun projects that involve wood and spray paint and tools!  All of our tools are in out unattached garage and as you all know this winter has sucked!  These past couple days we've actually had temperatures in the 20s and 30s.  It's been weeks since it's been that "warm!"  So, bear with me this month and next for smaller, in-house projects as it's been so cold.  

This month I was inspired by Lines Across to make foam stamps!  I'm a paper crafter, so any craft that is directly related to my obsession-I mean hobby-is awesome. 


Here is what I used.  The only product I had to purchase was the foam sheet, which was under $1 at Michael's.  Before I looked too much into this project, I was thinking I'd cut the foam with my Cameo and the possibilities of foam stamps would be endless!  As I was doing some research and poking around on the 2Peas message board, I found out that no one has really mentioned or publicly admitted to trying to cut foam with the Cameo.  I wasn't about to break my machine, so I decided to use punches and dies cut with my manual die cutter.  Well...the foam was too thick for my punches, so that left me with only my dies.

Now, I know there are already pre-cut foam shapes available at craft stores I could have used.  Some have adhesive on the back and some don't.  I didn't want to spend money on a ton of foam shapes that I'd probably not use (I am TRYING to be a little more aware and conscientious with my craft purchases).  Also, if you do plan on trying this with pre-cut foam shapes, whether with adhesive-backed ones or not, remember that when you temporarily adhere the shapes to a stamp mount, they will be mirror images.  For some shapes that may not matter, but for others it could look a little funny when stamping. 

Okay, so I pulled out pigment ink, dye ink, and chalk ink to test my foam stamps.  I pulled out my glue dots to help adhere the shapes to my acrylic stamp block.  Unfortunately, I do not have a lot of dies, so I was a bit limited in what I could cut.  I wish I had a word die to see how that would have shown up...


Here are all my shapes cut out.  Look at how cute those tiny chevron arrows, stars, and hearts are?!  


Here are my sample sheets.  I used some scrap heavy-weight smooth white cardstock.  


As you can see, the bigger shapes did not stamp very well.  The shape isn't filled in well enough to my liking.  And I felt like I spent forever (more like a minute) inking up the foam.


Now, the smaller foam shapes stamp really well I think.  I would use these cute little guys to do some stamping with.  The Hero Arts Mid-Tone ink stamped well, although it didn't give a crisp line at the edges.  That doesn't bother me too much, depending on the project.  The chalk ink stamped the best.  The dye and pigment inks were good too.


These are the "stamps" after taking them off the block.  I, personally, would not store these shapes for future stamping.  Even after 5 minutes or so, every time I touched the foam, ink would rub on to my hand.  Foam is cheap enough that using it as a fill-in for a stamp you don't have or a die you have, but wish you had a coordinating stamp for would be a great temporary tool.  

I really, really wish there was a known way to cut foam with the Cameo.  Until then, I probably won't be using foam as a temporary stamp.  But, if you have a lot of dies you wish were stamps or thin enough foam to use punches, this is a great way to stretch your stash. 

xoxo,
Heather

P.S.-I will tell you that I'll probably be using foam on my projects.  Those hearts are just too cute!

Wednesday, January 15, 2014

Pinterest Crafting: Sharpie Painted Mugs


Welcome to my first Pinterest Crafting blog series post!  This series is a monthly post documenting my adventures into all those DIY/Crafts pins all over Pinterest.  I will pick something from my Craft Ideas Pinterest board each month.  I will document the process of each craft or project with pictures and thoughts.  The most important aspect of this series is that I will be let you all know if it actually works!  

I know there is a woman (and I'm sorry, I can't remember her blog) that does something similar.  I will only be doing this once a month.  I will give some advice on what I did differently from the original pin and/or what I would do differently if I made a project again.

Okay, so let's get started...

This month, I went with something relatively easy.  I didn't want to do something too time consuming or that involved too many additional purchases.  I do plan on bigger DIY projects, but those will have to wait until the warmer months.  So, I went with something super popular:  Sharpie painted mugs!


I have a little background story about Sharpie mugs...During the summer of 2012 (when I was unemployed for 6 weeks after graduation), I started to get a little more crafty.  I had a lot of time on my hands.  One of the many projects I did that summer was the infamous Sharpie mug.  We had this nice soft yellow colored mug hanging out in our cabinet.  I decided that one day it needed to be decorated and it needed to be decorated with a quote about love.  Michael and I have this huge pack of Sharpies-all different colors, every color you can imagine.  I picked a small quote (it had to fit on the mug) about love.  All the words were written in black, but the word "loved" was written in red.  I popped that bad boy into the oven and voila!  I had a new mug.  Michael even liked it.  

I used it a few times, but the more I washed it, the more the quote started to rub off, especially the red Sharpie-d word.  I was not happy!  Not because I spent a lot of time on it, but because I thought this would be a great gift idea for that Christmas season.  Now, I was out of handmade ideas!

Anyways, a few weeks ago, I stumbled upon this post from Glued To My Crafts.  She took on this very project, with Sharpies, but with OIL-BASED SHARPIE PAINT PENS!

These changed my life.  And, there are tons of colors.  The only downside is that they probably aren't a common tool in your craft stash.  I had to go out and buy these paint pens.  And they weren't too affordable in a way in which I could get 10 colors at once.  I had to settle for three:  black, gold, and pink.  And these were $3.99 each at Michael's.  


Here is everything you need for this project:  ceramic coffee mugs, oil-based Sharpie paint pens, stencils/masks/stickers (optional and not pictured), and an oven.  The mugs I got from Target, only because I was already there getting something else. I had every intention to find some at the Dollar Store.  These were $3.99 each.  I thought I'd go with a simple design, something that didn't take too much thought.  As seen in one of the above photos, I went with polka dots.

Before you get started, you'll want to prime these paint pens.  I pressed the pen tip into the barrel with my finger for what felt like a million times!  Then you'll start to see the paint color saturate the pen tip.  The tip is white, so you'll see the paint color start to fill it (unless you have white, which I am sure may be a little difficult to see).


This was the first image I painted.  I really wanted to do polka dots in all three colors on the mug, but I felt like this pink was a little too "hot," but I still wanted to use it.  I had a die cut heart already on my craft table, so I put that in the bottom of my mug and traced around it with the paint pen.  Then I colored it in.  **This pink is more of a bright, hot pink, maybe even close to neon.  And it is opaque.  You can definitely tell that it is paint.**


Then I took the black Sharpie paint pen and started to make small-ish circles (these turned out to be ovals) all around the mug.  Next time, I'd take a little more time to make this slightly bigger circles.  **The black paints very smoothly and it is also opaque.  To me, it kind of went on like you were actually drawing with a regular Sharpie marker.**


To see how each color looked by itself, I made small circles with the gold on the other mug. **I have to say, I was quite disappointed by this gold Sharpie paint pen.  It paints more sheer than the other colors.  I don't know if it is because it's a "metallic" gold or what, but I didn't like it.  And, it seems to dry differently as well.  The outer circle of each dot looks different than the filled in color, which I don't like.**


Here's what the mugs look like with gold and black polka dots all over.  I still felt as if the mugs looked empty, so I decided to cover them with more small dots!


Here is what that decision looked like.  I like it better with the various sized dots. I wish the gold Sharpie paint pen were more opaque than it is, but oh well.

Off to the oven.  Set your oven for 350 degrees F and put your mugs inside.  I put mine on a small baking sheet.  Set the timer for 30 minutes.  After the 30 minutes is done, turn off the oven BUT LEAVE THE MUGS INSIDE.  I left my mugs inside the oven for a few hours.

I will definitely do something like this again.  Next time though, I'd plan it out a little better.  And, these oil-based paint pens can be used on glass and wood too, so I'll have to come up with a project to see how well these work on those materials.

I will also keep you updated on the status of the "wear" of the paint.  Hope you enjoyed this post about whether oil-based Sharpies really work on ceramic mugs!  If you have any suggestions for upcoming Pinterest crafts, please let me know in the comments section!

xoxo,
Heather