Pages

Showing posts with label gold. Show all posts

Tuesday, February 25, 2014

On Trend: Gold--Practical Scrappers DT Project

Welcome to my first ever design team project!  Can't you tell I'm excited?!  This month's Practical Scrappers on trend focus is GOLD!  And you all know how much I LOVE gold...

I absolutely had to play along with this on trend focus.  Something I'm working on this year is expanding my papercrafting creativity.  I love layouts, cards, and mini albums, but I want to challenge myself creatively and start making other paper goodness.


And here is an adorable treat/goodie bag!  This idea comes from Angie over at Chic 'n Scratch.  I love watching her YouTube videos making different projects with Stampin' UP! products.  While I was watching the video where she demonstrates how to make this bag, I instantly knew my first Practical Scrappers project would be a gold bag.


Products I Used

  • Gold doilies vellum from Crate Paper Maggie Holmes' Flea Market collection
  • Versamark Ink
  • Ranger Super Fine Detail Gold Embossing Powder
  • Black Card Stock
  • Gold chevron paper from My Mind's Eye Record It! Charmed collection
  • Metallic gold and white twine
  • Paper trimmer
  • Score Board


Tutorial 
**I had to make this bag again a couple more times to get figure out what I did wrong.  The bag pictured at a score line wrong, so the front of the bag is wider than the bag of the bag.**


  1. Cut a 12"x12" piece of paper to 11 5/8"x5"
  2. Score at 1 3/8" down the length of the paper or on the portrait side
  3. Turn the paper and score at 2 1/8", 5 1/4", 7 3/8", and 10 7/16" on the landscape side
  4. Fold the paper at all the score lines
  5. Turn your paper on the landscape side.  There will be longer rectangles on the top and shorter rectangles at the bottom.  Cut up on all the score lines (from the bottom of the paper with the shorter rectangles) to the perpendicular 1 3/8" score line
  6. At the ends of the paper there will be 2 "thinner" panels.  Cut the bottom square out made by the 10 7/16" score line intersecting with the 1 3/8" score .
  7. Start to fold your paper into the bag shape.  All those flaps will form the bottom of the bag.  Fold your shorter flaps in and then adhere one of the wider flaps onto the other to get the bottom of the bag.
  8. Gentle tuck in the sides of the bag so we can tie the top closed
  9. Hole punch at the top of the bag
  10. Heat emboss your sentiment onto cardstock and cut into a pennant shape
  11. Mount sentiment pennant onto patterned paper cut into a slightly larger pennant
  12. Adhere sentiment to bag
  13. Tie bag closed with twine


Now you have your cute bag!  Check out the original blog post with the video here. 


This is a quick project to put together if you need something last minute.  They would be super cute as the bags for party favors for a birthday party or bridal shower or any kind of party.


Hope you enjoyed my first Practical Scrappers DT project!  Next time I do a project with lots of steps, I'll do better at taking pictures along the way.  

xoxo,
Heather

Thursday, November 7, 2013

Sweet & Kelster Challenge: Using the Same Products-Treat Bags!

Hello lovely readers!  Welcome to another Sweet & Kelster Blog Challenge!  Congratulations to Heather Adams on winning the Halloween challenge.  Kelly will contact you about your $5 gift certificate to Two Peas in a Bucket!

Are you guys ready for this challenge round?  This time, Kelly and I decided to create something using the same product!  We both had different takes on this challenge, but that's the beauty of a challenge!  Kelly sent me these adorable treat bags she had purchased from The Plaid Barn I believe last year.  This site is one of those daily deal websites for crafty stuff!  Can't go wrong there!  Anyways, she mailed me 9 treat bags:  5 orange and white striped glassine bags and 4 brown and white striped glassine bags.  

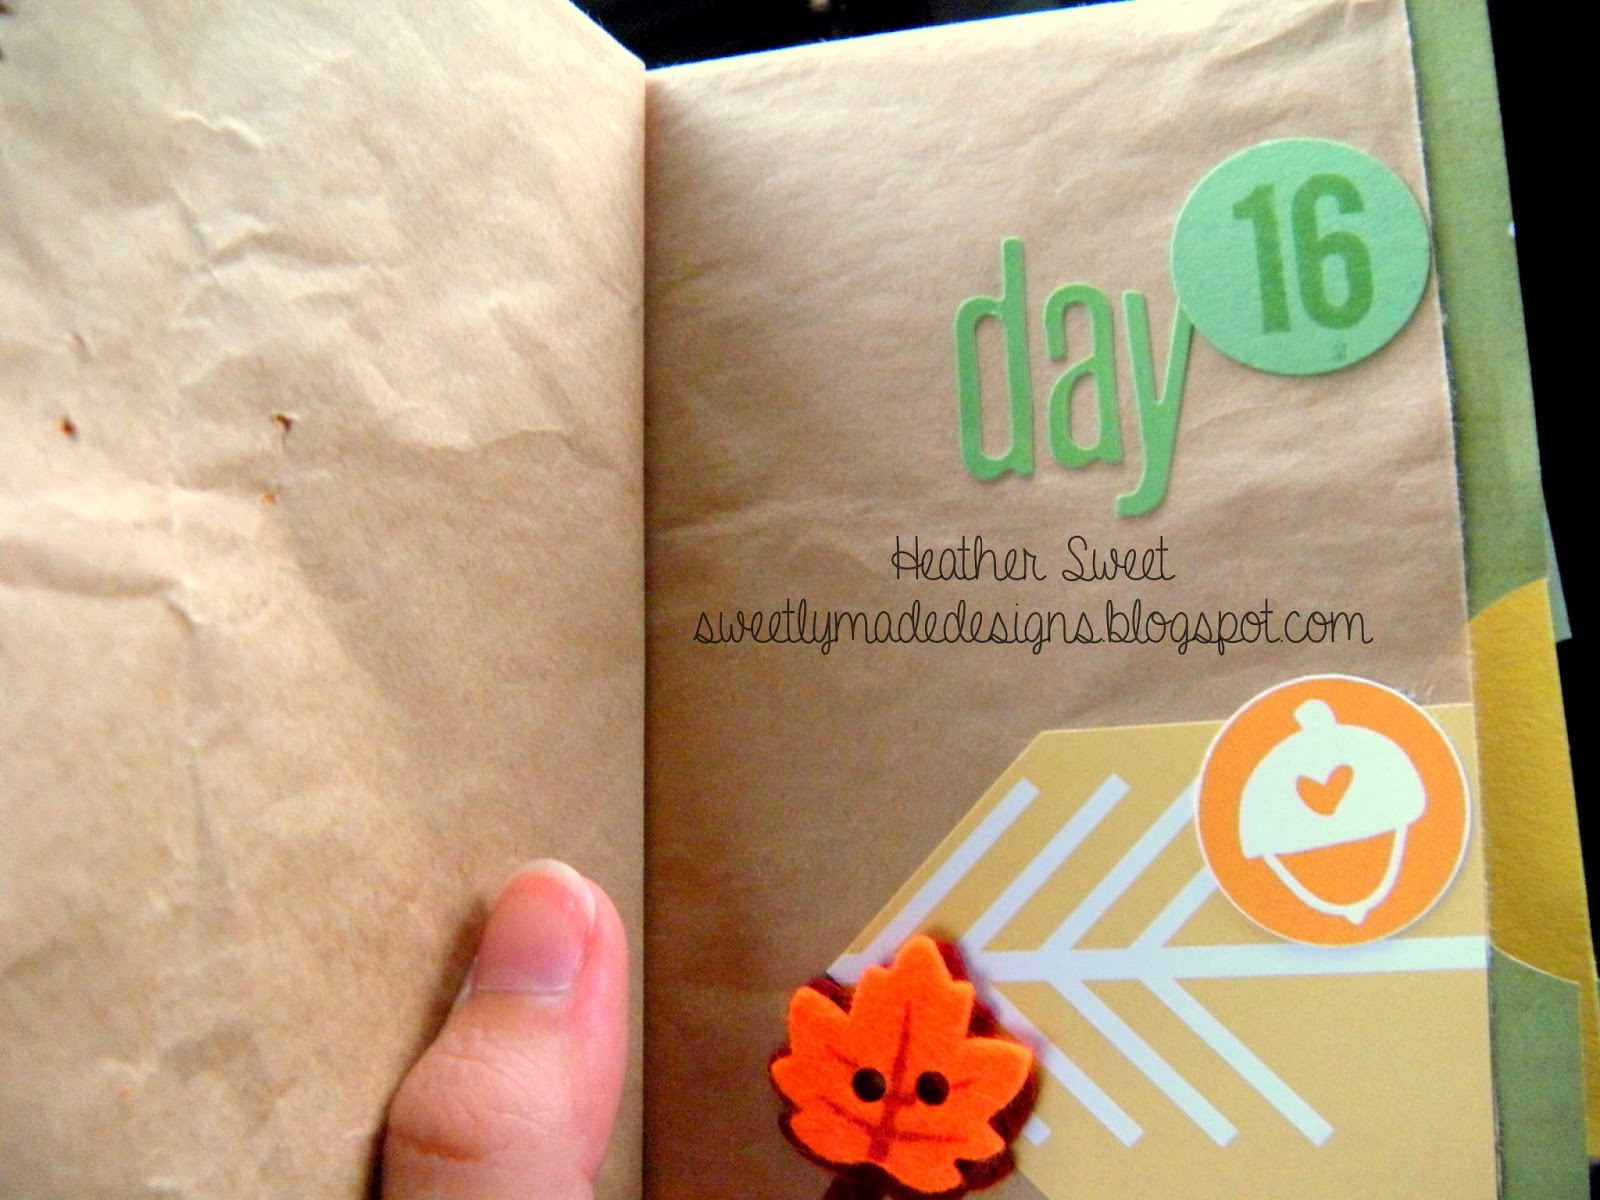
I got these cute babies in the mail Saturday afternoon.  I was already holed up in my scrap room and my mojo was high.  As soon as I opened the package and saw these treat bags, I knew what I was going to do with them.  It was really a spontaneous idea:  a "Thankful" mini album!  The colors were screaming autumn/Thanksgiving, so it was perfect.  And, I save all my paper treat bags from kits, so I definitely had enough bags to cover the 30 days of gratitude.  Now, I didn't plan to make a gratitude album this season.  I get a little overwhelmed with mini albums (I still have one that I've cut the paper for and printed the pictures and haven't done anything since), but I was already feeling the craft-high, so I just went with it.  I was definitely going to journal daily about my gratitude, but a project was not an intention.

So, here's the finished project...


I knew from the beginning that I wanted to hand-paint my title, like in this layout by Garden Girl Kristina Nicolai-White.  And, if you read my post yesterday, you know that I've been obsessed with gold! I just had to try this technique and I love how it turned out.  


I really wanted to challenge myself beyond using these treat bags, which was to use my stash for embellishing my mini album.  I wanted to stay with the traditional autumn color scheme of burnt orange, deep red, darker/mustard yellow, deep green, and brown.  I pulled everything in that color scheme from my stash.  And let me tell you, there wasn't much.


I do have to let you guys know that I cheated a little.  You see that cute felt leaf, the green sequin leaf, and the fall-themed stickers?  I got those from Michael's Saturday night.  Again, not intentionally.  Michael and I went to get him some sketchbooks and I happened to see a display of fall-themed craft stuff for 80% off!  I got felt leaves, sequin leaves, and fall-themed stickers each under $1! I couldn't say no.  So, I was able to add some fall-themed embellishments to my mini album.  Something I am thankful for!


I had a lot of fun putting this mini album together.  It's simple, but cute and all I have to do is write down what I'm thankful for each day on the piece of cardstock in the pocket and slap a photo on the bag side of each day.  As you guys were hopefully able to see in the tutorial, each treat bag was folded in half to make 2 pockets.  Each pocket will represent a day.  Journaling goes on the pull-out cardstock and a photo will go on the back of the day.  I'm doing a photo daily journal #mythankful30 using a list from @lilgik at feedyourcraft.com.  I am not documenting every photo on Instagram, only because some photos I'll have to pull from my photo library because some of the prompts may not match up to the day (i.e. a bright sunshiny day on November 23rd may not be sunshiny).  


Here's a picture of some of the plain paper bags I used in my mini album as well.  


I still haven't decided how I'm going to bind it.  I did punch small holes in everything, but it's really thick, so I don't know if rings would be a good idea.  Right now I have it all bound with twine, but I don't know if I'll like it.  

Now, it's your turn!  Share a project of yours and someone else's using the same products or kit. Make sure to include the link to your project and the other project in the comments section or Kelly's comments section for a chance at the prize.  Remember, the prize is a $5 gift certificate to Two Peas in a Bucket!  You have until Wednesday, November 20th to link up your project!  Now, go check out Kelly's take on our challenge.  You won't be disappointed; it's super cute!

xoxo,
Heather

Wednesday, November 6, 2013

Inspiration Wednesday

Happy Hump Day lovely readers!  I decided to do something a little different this Wednesday-I'm going to bring you a post full of what's inspiring me lately!  I'll still bring you On My Wishlist Wednesday, but probably only 1-2 times a month.  

Here are some things that have been inspiring me lately.  


Starting from the top left corner...


  • I love the color scheme in this layout by Two Peas in a Bucket's Garden Girl Shimelle.  Lately, I've been loving a bright color paired with black and white.  I also like how this layout uses some journaling cards from the Becky Higgins Project Life Midnight Core Kit.  If you've been reading my blog, you all know how much I love this core kit and since I have hundreds of these cards, new ideas for using them are always appreciated.
  • I am loving these stitched vellum pockets full of little goodies, i.e. sequins, punches, die cuts, wood veneers.  I love the snowflake in this vellum pocket by Two Peas member jrench.  I also like that the pocket is stitched to the top of this page.
  • If you guys couldn't tell by my photo collage, I am feeling so inspired by December Daily(TM) albums, Christmas albums, etc.  I love the page of pocket protectors full of little goodies.  It's such a great way to break up a Christmas album or any album for that matter.  Plus, there's an excuse to use all those holiday-themed embellies you have!  Unfortunately, I wasn't able to find the website I originally pinned this from to give proper credit.  If anyone knows, please let me know.
  • Wilna Furstenberg.  Enough said.  Everything she creates is inspiring!  Besides the super trendy chalkboard look this layout shows, I love the banner underneath her photo.  I've really been meaning to try this.
  • Another Two Peas Garden Girl I admire is Corrie Jones.  This particular layout was made by her for Elle's Studio, but she's created a layout like this for a Two Peas video.  I love the idea of drawing shapes with spray mist.  I lovely way to create your own background/pattern paper.
  • I love how Kristina Nicolai-White painted this title for her layout.  I recently did something like this on an upcoming project I'll be posting on my blog soon!  Get excited!
  • I LOVE GOLD!  I don't know when this happened, but I have suddenly been all about gold-in my crafting, in my clothes, in my accessories. I not only love this quote, but I like how it looks like gold foil.  Just beautiful!
  • These next two inspiration photos are from Michelle Wooderson.  I am in love with everything she creates.  I love her layering techniques, her style, her use of mixed media in a bright, colorful way. I love this sequin pocket with the gold doily.  In this post, she also has pictures of other pockets she jazzed up.  The last photo I cannot find the exact post for, but I love the layering with the tag.  Using tags is one of my favorite ways to embellish a page.  


Hopefully these photos inspire you to create something that you've recently been loving.  Link up what's been inspiring you in the comments section.

Also, you have until midnight tonight to link up your Halloween projects for the Sweet & Kelster blog challenge.  Information and details can be found in this post.  There is a $5 gift certificate to Two Peas in a Bucket for the winner!

xoxo,
Heather