
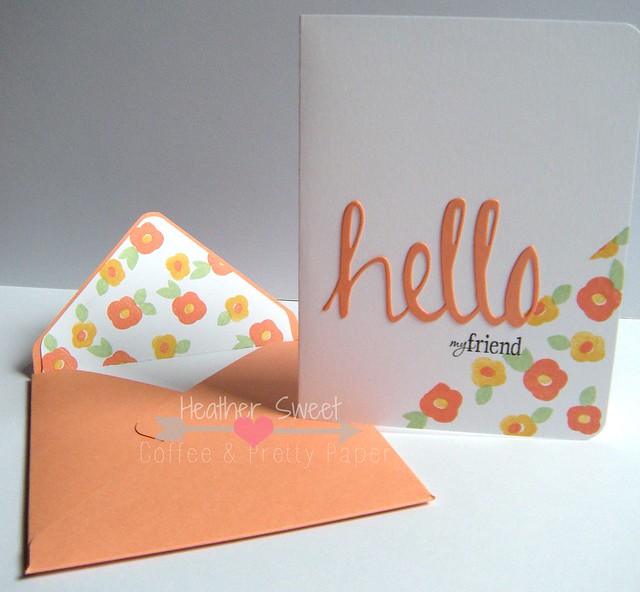
This card was so much fun to make! It came together pretty quickly after I figured out the colors I wanted to use.
How To:
The Card
- Cut your white cardstock (8.5" x 11") in half at 5.5" on the long side. This, of course, gives you two card bases. Fold one of the two pieces in half. My card measures 4.25" x 5.5". Round your corners.
- Take a piece of washi tape to section off the lower right corner of your card front. This is where you will be stamping the flower images.
- Using any small flower stamp image (I used Avery Elle's Oh Happy Day stamp set), stamp the flower a few times in the corner in one stamping ink color.
- Using another small flower stamp image, stamp this flower a few times in a coordinating stamping ink color.
- My stamp set-the Avery Elle set mentioned above-has a couple flower center stamp images. I used this flower center stamp to stamp a yellow center in the peach-y flowers and the peach center in the yellow flowers.
- Using a small flower leaf stamp, stamp leaves on each flower in a green stamping ink.
- Remove the washi tape to display that crisp "line" between white cardstock and stamped images.
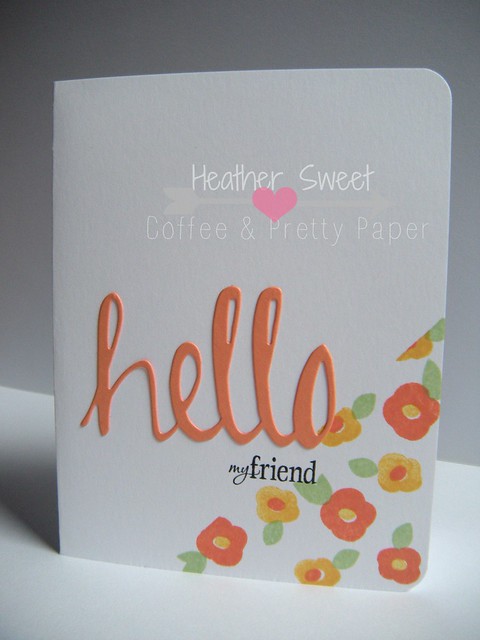
The Sentiment
- Using a peach-y colored cardstock that coordinates with your peach-y stamping ink, die cut the word "hello." (The color coordination of the stamping ink and cardstock was simple, as I'm using Stampin' UP! products.)
- Adhere the die cut "hello" towards the bottom of the card front, making sure to overlap the word slightly with your pretty flower corner.
- I decided to add a little more to the "hello" sentiment. With another stamp, I stamped the additional sentiment, my friend, in black ink, right justifying this smaller sentiment below the larger "hello."
- Your card is done!
The Envelope
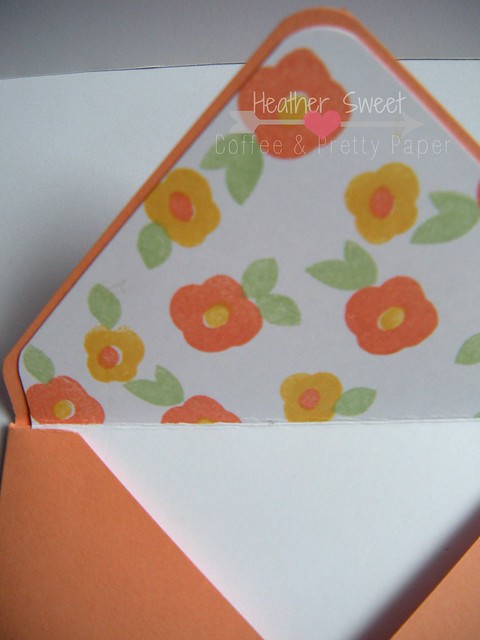
Using the We R Memory Keepers envelope punch board, I made my coordinating envelope for my card.
Hint: the WRMK's board does not have the measurement for the common card size of 4.25" x 5.5", but I have those measurements!
- Using the same colored cardstock you used to die cut "hello," cut a square 8" x 8".
- Using the punch board, make your first score mark at 3.5", continuing to make your score marks around the square.
- To make the envelope liner, you're going to act like you're making another envelope, but with white cardstock. BUT, cut your square a 1/4" smaller than your envelope. In this case, cut a square 7.75" x 7.75". Still make the first score mark, using the board, at 3.5".
- Depending on how you will have your envelope open, cut the side flaps of the white "envelope" off. Then you're left with the middle of the envelope (or the top and bottom). Cut this piece in half. This will give you 2 white envelope liners.
- I used the same stamps and stamping ink on the envelope liner as I used on the card, to coordinate the envelope even more with the card.
I hope these instructions made sense. If you have any questions, especially with the envelope liner (I felt that may have been a little confusing), just let me know in the comments section! Supply list is below!
xoxo,
Heather
Supply List
- white cardstock
- paper trimmer
- washi tape
- Simply Said Hello Die by Avery Elle
- Oh Happy Day Clear Stamp Set by Avery Elle
- Glossy Accents
- Stampin' UP! Crisp Cantaloupe cardstock
- Stampin' UP! Crisp Cantaloupe stamping ink pad
- Stampin' UP! Pistachio Pudding stamping ink pad
- Stampin' UP! So Saffron stamping ink pad
- Stampin' UP! Six Sided Sampler stamp set
No comments:
Post a Comment