Pages

Wednesday, January 22, 2014

Favorites From CHA-Winter: Part I

I was really hoping to keep this post down to one, but there are so many things I absolutely LOVE from CHA last week.

So, let's begin!  Melissa Stinson, over at the The Scrappy Jedi, does a great job on compiling all the new collections debuted at CHA-Winter.  That is where I go to see all the new releases.

American Crafts

DIY Shop


What I like most about this particular collection are the chalkboard labels and badges, the decorative tape, and the cork stickers.


Dear Lizzy-Daydreamer


I usually like all of the Dear Lizzy lines.  This line hasn't called to me yet, but it may take me seeing the product in person (like Polka Dot Party).  There are one or two papers I like.  I am really liking the dies and the rub-ons.

Amy Tangerine-Plus One


I really like the colors of Amy Tan's new line.  I'm really loving the pop of black among these bright colors.

Chic Tags

Cloud 9


Love this line!  I love everything in this line!  Check out the blog post for the full reveal.

Crate Paper

Styleboard by Maggie Holmes


**watch this video from scrapbook.com 
I've read that some people think this line looks so much like her previous lines (especially her original line, in my opinion), but I still like it.  Some of the papers I'm not too fond of, but there are some that I would definitely use. I like the gold "Dymo" label stickers, the decorative tape, the phrase roller stamp, the gold rub-ons, the doily embossing folder (!!), and the die set.  

Doodlebug Design

Kraft in Color 


I am so excited for this collection!  I love kraft and pairing that with some color is going to be awesome!  

Echo Park

Capture Life by Allison Kreft


What I love most about this collection are the bokeh prints!  I was watching a scrapbook.com video showing this line at CHA and it looks like the final patterned papers haven't yet been decided.  I hope they keep all the bokeh prints though!

Glitz Design

Carpe Diem


I love everything about this line!  This picture doesn't do it justice, so check out this video by scrapbook.com showing you this line.  I never used to like Glitz Design, but their Wild & Free collection released at CHA-Summer 2013 started to change my mind.   

Black & White

I am so excited about this collection!  One of my goals this year is to start my wedding album.  I've been struggling with the color scheme for my pages because I wasn't sure how exciting a black, white, and red album would be.  I didn't want to invite bold colors into my album that weren't represented at the wedding...basically I was it off.  Then this collection happened!  I already told my husband I'm buying every piece of this (probably a few doubles of some things) when it's released.

So, here's will I will stop for today.  There are a handful of other collections I am loving which I'll post about later this week or weekend.  What collections are you looking forward to from CHA?

xoxo,
Heather

Friday, January 17, 2014

Just Two Midwest Girls Scrap Challenge: Scrap Your Goals!


Welcome back everyone!  Kelly and I saw some awesome December albums for our last challenge.  Our winner is Amanda! Please contact Kelly about your prize. Check out Amanda's amazing album here.  Thank you to everyone who linked up their albums.  Please continue to play along with us!

Whoa, have these two weeks just flown by!  Kelly and I are back with a fun new challenge that's perfect for the beginning of a new year.  Today, we're bringing you our projects where we scrap our goals!


2014 Intentions by Ali Edwards

This layout, by Ali Edwards, was our inspiration piece.  This layout and the Ali Edwards' story can be found here in the Winter 2013 issue of Scrapbooking and Cards Today (this is a free online magazine, by the way!).  Her story begins on page 53.


This challenge was a perfect way for me to scrap about my One Little Word.  I honestly didn't have any intention of doing a layout like this, but it just went perfectly with some of the January prompts for Ali's workshop.

I was going through my stack of patterned paper and cardstock a week or so ago.  I started matching up some papers for a project I had in mind (more on that in another post).  The combination of this large confetti circle patterned paper from Glitz Design's Wild & Free collection with this lime green cardstock was meant to be.  I just couldn't stop thinking about how fun and bright and ME these papers were, so I knew I had to use them for this challenge.

I mounted the patterned paper onto the green cardstock and brought in this white chevron arrow heads on a pink background patterned paper from Dear Lizzy's Polka Dot Party line.  I used this paper for strips at the top and bottom of the layout, as well as for a mat behind my picture.


I took this picture last week while at work.  I wanted a recent photo of me, but I didn't have a good one, so I had to take a work selfie.  And because the lighting sucked and I knew what colors I'd use for this layout, I toned the photo down by making it black and white.

For the layers behind my photo, I used some of the lime green cardstock, scraps from another Glitz Design Wild & Free paper (black hearts on a white background), the Dear Lizzy pink patterned paper, a glassine bag, and I believe a gray patterned paper also from the Wild & Free collection.  I have been loving this stack of patterned paper behind a photo.  

The "2014" is Dear Lizzy Thickers and the word "intentions" is cut out from the same lime green paper using my Cameo.  I just used a font on my computer (I think it was Honey Script).  


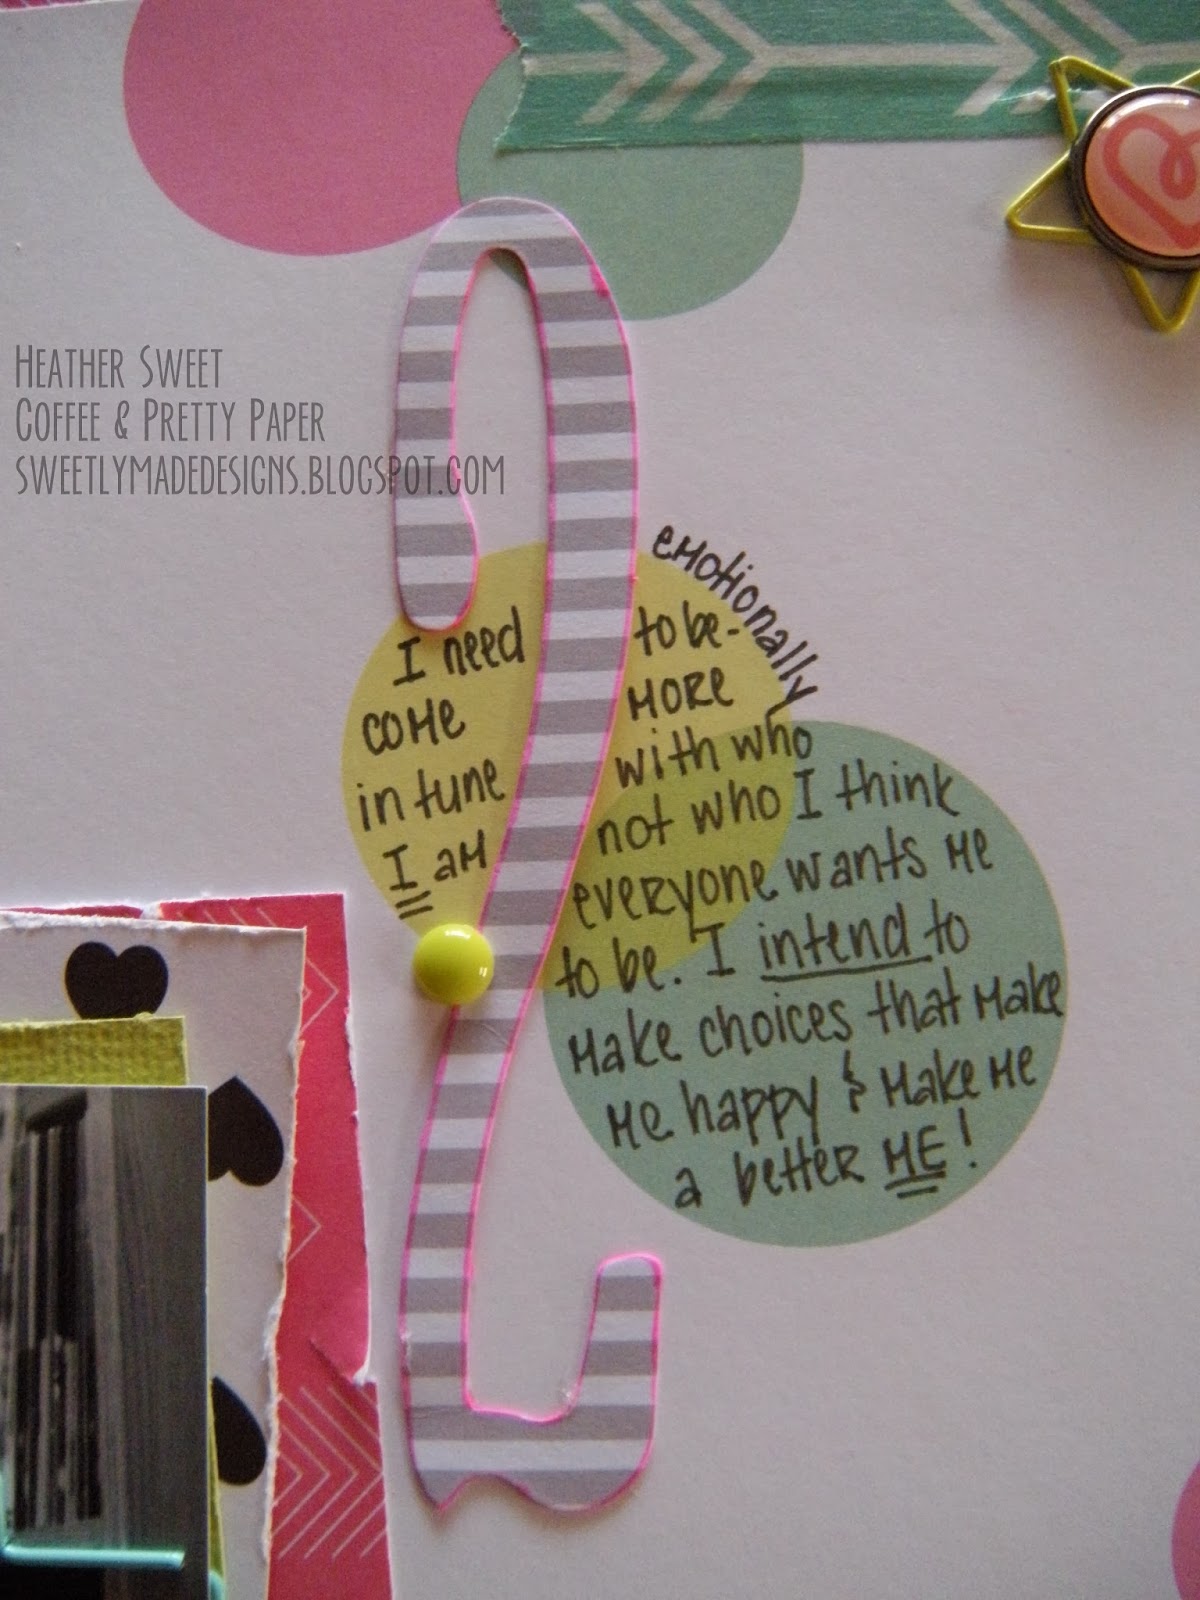
 Before this layout even started, I knew I wanted to use those big numbers from the Heidi Swapp Mixed Company Ephemera Pack (this came in the November 2013 Citrus Twist main scrapbook kit).  I wanted this to be in a list format.  As the layout was coming together, I really wanted those circles on the patterned paper to be my journaling spots.  That's how I figured out where to space my numbers.  I ran a neon pink highlighter around the edges of each number to make them pop against the background.  Before, the numbers we just getting lost.  

As I mentioned earlier, this journaling comes from Ali Edwards' One Little Word January prompts.  I used the four areas of my life to focus on intentions for this year:  physical, emotional, creative, and in my relationships.  Then I wrote some overall intentions for each focus area.  It's amazing all the ways I have been inviting my OLW into my life, just by embracing it and taking opportunities to think about and make it mine.


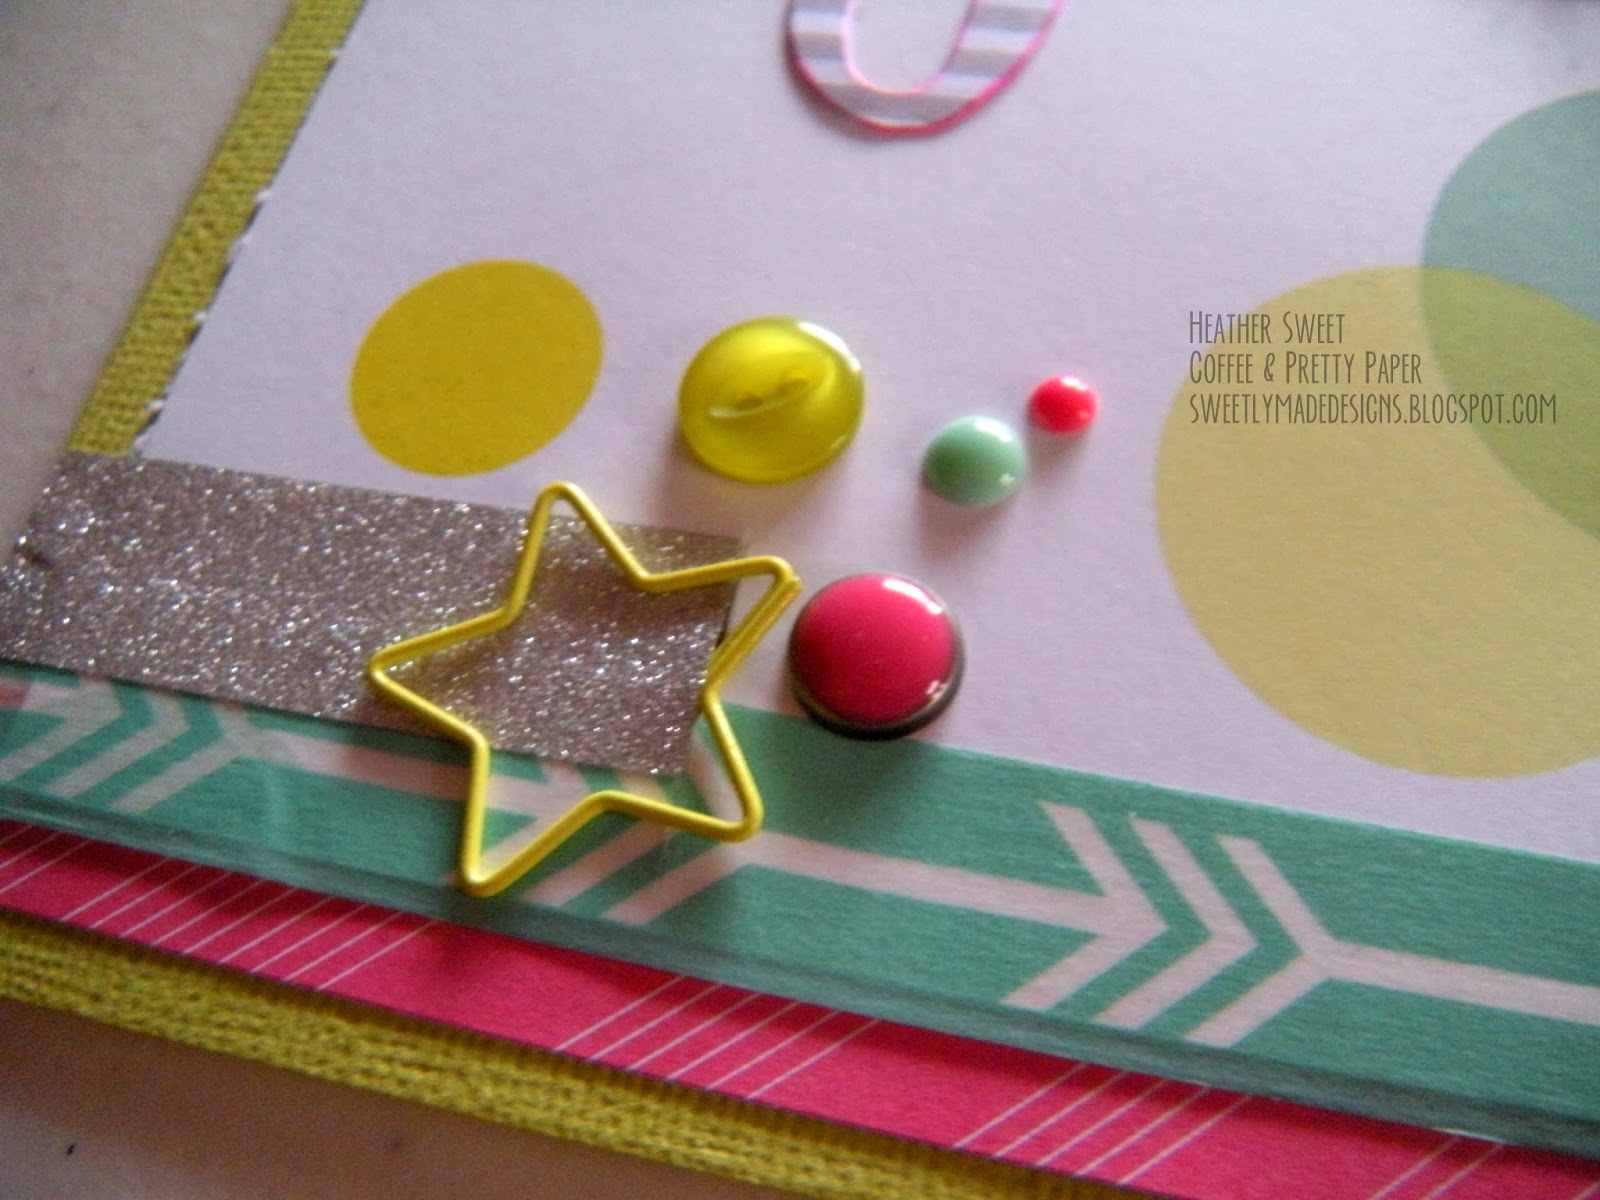
I embellished with some washi tape from one of the MME Cut & Paste lines;  the silver glitter tape Kelly got me for Christmas!; brads, enamel dots, and buttons from the MME Cut & Paste Adorbs collection; word stickers from the MME Cut & Paste Flair collection; and star and arrow Two Peas in a Bucket exclusive paper clips.

I can't tell you how much I love this layout.  I think I'm going to hang it up on my bulletin board in my scrap room so I can see it everyday.  

So, now it's your turn!  Come play along with us and scrap your goals!  It doesn't have to be a new project.  It doesn't have to be related to new year's resolutions or goals.  It doesn't have to be a layout.  Maybe you created a journal to document your personal goals from any areas of your life.  It can be ANYTHING!  We just love seeing your projects!  

Link your project in my comments section on this post, in Kelly's comments section on her blog, or onto our Facebook page (this can be found in my side bar!). You have until Thursday, January 30 at 8pm CST to show us how you're scrapping your goals.  Those that play along could win a $5 gift card to Two Peas in a Bucket.

Don't forget to like our Facebook page!  Now, head on over to Kelly's blog to see how she scrapped her goals.  Looking forward to seeing your projects!

xoxo,
Heather

Wednesday, January 15, 2014

Pinterest Crafting: Sharpie Painted Mugs


Welcome to my first Pinterest Crafting blog series post!  This series is a monthly post documenting my adventures into all those DIY/Crafts pins all over Pinterest.  I will pick something from my Craft Ideas Pinterest board each month.  I will document the process of each craft or project with pictures and thoughts.  The most important aspect of this series is that I will be let you all know if it actually works!  

I know there is a woman (and I'm sorry, I can't remember her blog) that does something similar.  I will only be doing this once a month.  I will give some advice on what I did differently from the original pin and/or what I would do differently if I made a project again.

Okay, so let's get started...

This month, I went with something relatively easy.  I didn't want to do something too time consuming or that involved too many additional purchases.  I do plan on bigger DIY projects, but those will have to wait until the warmer months.  So, I went with something super popular:  Sharpie painted mugs!


I have a little background story about Sharpie mugs...During the summer of 2012 (when I was unemployed for 6 weeks after graduation), I started to get a little more crafty.  I had a lot of time on my hands.  One of the many projects I did that summer was the infamous Sharpie mug.  We had this nice soft yellow colored mug hanging out in our cabinet.  I decided that one day it needed to be decorated and it needed to be decorated with a quote about love.  Michael and I have this huge pack of Sharpies-all different colors, every color you can imagine.  I picked a small quote (it had to fit on the mug) about love.  All the words were written in black, but the word "loved" was written in red.  I popped that bad boy into the oven and voila!  I had a new mug.  Michael even liked it.  

I used it a few times, but the more I washed it, the more the quote started to rub off, especially the red Sharpie-d word.  I was not happy!  Not because I spent a lot of time on it, but because I thought this would be a great gift idea for that Christmas season.  Now, I was out of handmade ideas!

Anyways, a few weeks ago, I stumbled upon this post from Glued To My Crafts.  She took on this very project, with Sharpies, but with OIL-BASED SHARPIE PAINT PENS!

These changed my life.  And, there are tons of colors.  The only downside is that they probably aren't a common tool in your craft stash.  I had to go out and buy these paint pens.  And they weren't too affordable in a way in which I could get 10 colors at once.  I had to settle for three:  black, gold, and pink.  And these were $3.99 each at Michael's.  


Here is everything you need for this project:  ceramic coffee mugs, oil-based Sharpie paint pens, stencils/masks/stickers (optional and not pictured), and an oven.  The mugs I got from Target, only because I was already there getting something else. I had every intention to find some at the Dollar Store.  These were $3.99 each.  I thought I'd go with a simple design, something that didn't take too much thought.  As seen in one of the above photos, I went with polka dots.

Before you get started, you'll want to prime these paint pens.  I pressed the pen tip into the barrel with my finger for what felt like a million times!  Then you'll start to see the paint color saturate the pen tip.  The tip is white, so you'll see the paint color start to fill it (unless you have white, which I am sure may be a little difficult to see).


This was the first image I painted.  I really wanted to do polka dots in all three colors on the mug, but I felt like this pink was a little too "hot," but I still wanted to use it.  I had a die cut heart already on my craft table, so I put that in the bottom of my mug and traced around it with the paint pen.  Then I colored it in.  **This pink is more of a bright, hot pink, maybe even close to neon.  And it is opaque.  You can definitely tell that it is paint.**


Then I took the black Sharpie paint pen and started to make small-ish circles (these turned out to be ovals) all around the mug.  Next time, I'd take a little more time to make this slightly bigger circles.  **The black paints very smoothly and it is also opaque.  To me, it kind of went on like you were actually drawing with a regular Sharpie marker.**


To see how each color looked by itself, I made small circles with the gold on the other mug. **I have to say, I was quite disappointed by this gold Sharpie paint pen.  It paints more sheer than the other colors.  I don't know if it is because it's a "metallic" gold or what, but I didn't like it.  And, it seems to dry differently as well.  The outer circle of each dot looks different than the filled in color, which I don't like.**


Here's what the mugs look like with gold and black polka dots all over.  I still felt as if the mugs looked empty, so I decided to cover them with more small dots!


Here is what that decision looked like.  I like it better with the various sized dots. I wish the gold Sharpie paint pen were more opaque than it is, but oh well.

Off to the oven.  Set your oven for 350 degrees F and put your mugs inside.  I put mine on a small baking sheet.  Set the timer for 30 minutes.  After the 30 minutes is done, turn off the oven BUT LEAVE THE MUGS INSIDE.  I left my mugs inside the oven for a few hours.

I will definitely do something like this again.  Next time though, I'd plan it out a little better.  And, these oil-based paint pens can be used on glass and wood too, so I'll have to come up with a project to see how well these work on those materials.

I will also keep you updated on the status of the "wear" of the paint.  Hope you enjoyed this post about whether oil-based Sharpies really work on ceramic mugs!  If you have any suggestions for upcoming Pinterest crafts, please let me know in the comments section!

xoxo,
Heather

Saturday, January 11, 2014

The One with the Ladies Night Out!

Ooohh la la!  Right?!  It's not what you think...


My friend and I decided a month or so ago that we wanted a craft night.  And we wanted something a little different than paper play.  My friend discovered a pottery place that has pottery painting classes.  And, just by chance, the night we were both free there was a ladies night.  

  
We had a lot of fun.  We painted a ceramic "canvas."  And it was a perfect opportunity to create something to make my One Little Word visible.


How trendy is this background?  My friend and I had no idea what we were making before we walked into the classroom. 


I used a silkscreen for the first time. And we painted with our fingers.  It was really freeing.  


And here is the finished project (minus the visit to the kiln).  I hand-painted my word instead of using a stencil.  This was a perfect opportunity to display my One Little Word.  I can't wait to pick this up and hang it in my scrap room.

I am definitely doing something like this again.  This studio has a ton of raw pottery items that are available to buy and then you can pay for studio time to paint!  The hubby and I decided that we would do that for a date night!

For those of you participating in the One Little Word journey, have you made a project to display your word?

xoxo,
Heather

Friday, January 10, 2014

The One with the Liebster Award


Whoa!  Thank you so much Kelly Jean over at Things About Stuff for nominating me for the Liebster Award.  This is my first award and it just gives me warm fuzzies for even being nominated!

So, this award is very special for those of us bloggers that LOVE to share a little bit about ourselves and various passions but may not have too many readers.  The idea of this award is to connect other readers and bloggers to your blog.

I did a little more research on this award and came across this blog post by Lorraine Reguly.  She compiled a list of the different sets of rules for the Liebster Award along with a little background into its origins.

Here is how it works (according to Lorraine's blog post):

If you have been nominated for The Liebster Award AND YOU CHOOSE TO ACCEPT IT, write a blog post about the Liebster award in which you:

1. thank the person who nominated you, and post a link to their blog on your blog.
2. display the award on your blog — by including it in your post and/or displaying it using a “widget” or a “gadget”. (Note that the best way to do this is to save the image to your own computer and then upload it to your blog post.)
3. answer 11 questions about yourself, which will be provided to you by the person who nominated you.
4. provide 11 random facts about yourself.
5. nominate 5 – 11 blogs that you feel deserve the award, who have a less than 1000 followers. (Note that you can always ask the blog owner this since not all blogs display a widget that lets the readers know this information!)
6. create a new list of questions for the blogger to answer.
7. list these rules in your post (You can copy and paste from here.) Once you have written and published it, you then have to:
8. Inform the people/blogs that you nominated that they have been nominated for the Liebster award and provide a link for them to your post so that they can learn about it (they might not have ever heard of it!)
Eleven Random Facts About Me
  1. I hate wet hair.  I don't like the way it feels.  I can't lay down or lean my head against anything when my hair is wet.  I don't like it when it touches my neck when I'm getting dressed.  I'm cringing just thinking about it...
  2. I was born in California, but only lived there for 3 months.
  3. When I was younger (teenager-ish), I used to read 6 books at a time, reading a chapter a day in each book.  Such a dork!
  4. I always try to read the book before I see the movie.  
  5. My husband owns more shoes AND clothes than I do...at least three times as many in both categories.
  6. I like fruity candy and sweets more than chocolate.
  7. I like the idea of a clean house more than I like to clean my house.  Sometimes I say I love to clean, but it's not entirely true.
  8. I moved in with my now husband 3 months after we met.  (I know, right?!  Unbelievable, but we knew we were meant to be.  Cliche, I know.)
  9. My favorite food is nachos.  I will eat the hell out of some nachos.
  10. I'm beginning to realize I like blogging and crafting more than my day job.
  11. I have an Etsy shop!  Which hasn't been updated, but it's on my to do list!
My Answers to Kelly's Questions

  1. Why do you blog?  Well, I actually wanted to blog originally because I saw a design team post for Citrus Twist Kits back at the end of 2012.  One of the requirements was to have a blog.  I knew then that my goal for 2013 was to start my own blog.  Now, it's not just to apply to design teams (although that is a dream of mine), but to meet people just as passionate about papercrafting as I am.
  2. What is (are) your highlight(s) of 2013?  Let's see...I don't think anything significant happened in 2013.  I mean, it was a great year.  I learned a lot about myself as an adult, an individual finally done with school, a wife, a sister, a friend.  Michael and I decided on some serious life plans.  I met some great new friends.  I embraced my hobby.  I focused on being happy.
  3. What hobbies do you have?  Besides playing with paper, I love to read.  I'm trying to like yoga.  
  4. What is your favorite dessert?  I don't know if I have a favorite...I think it would probably be cheesecake.  Any kind of cheesecake.
  5. If you could go anywhere in the world, where would it be?  Italy.  I'd love to do one of those 21-day tours that take you all over the country.
  6. Did you have pets growing up?  Yes, mostly cats.  When I was really young, before the age of 4, we had 2 cats, Midnight and Boo.  After my brother was born, we had to give them away because of his allergies.  Sometime while I was in middle school, we got a dog and my sister snatched a kitten from a field by my uncle's house.  The dog, Mikey, we gave to some friends with a farm a year later.  Our house and yard wasn't big enough for him and we didn't have time for him.  The cat, Stripes, is still alive and kickin'.
  7. What is your favorite thing about yourself?  I'm less high strung and more down to earth than I used to be.  I really like that.  As for a physical feature, my eyes.  I've been told I have really pretty eyes.
  8. Do you like sports?  If so, who do you cheer for?  I'm a die hard St. Louis Cardinals fan, as well as an Illini fan.  I like the Chicago Bears, but not as much as the Cardinals and the Illini.
  9. What is your favorite season of the year?  Why?  I go back and forth between spring and fall.  I like those milder temperatures.  I like being able to wear jeans, boots, and a top with a lightweight sweater or blazer.  
  10. Do you have a piece of jewelry you wear everyday?  Yes, I wear my wedding and engagement rings.
  11. Name three things on your life bucket list.  Go to Italy.  Go white water rafting.  Go to a vineyard.
Now for my nominations...

Emily Adams:  Mrs. Crafty Adams
Ange:  One Person's Scrapping Compulsion
Christine Cieri:  Christine Cieri
Molly Frances:  Look What I Made
Cristi Wuenschel:  Dysfunctionally-Functional
Jen Schow:  Things That Matter
Kait:  Cafe et Papier
Brittany McLeod:  KraftyBuns
Mary:  Me, With My Head in the Clouds
Holly Ford:  Fordward Moving Mommy
Kaylea:  My Scrappy Life

***I apologize if I didn't stick with the less than 200 followers.  I based these nominations on blogs I like and the amount of followers (if visible on their blogs) for each blog.

My questions for the bloggers I nominated

  1. Describe your ideal day.
  2. If you could remodel/redecorate any room in your home, which room would it be and what would you do with it (you have unlimited funds)?
  3. What is your day job?
  4. What did you want to be when you "grew up?"
  5. What is the number one thing you want to accomplish in 2014?
  6. What do you like about blogging?
  7. Do you enjoy cooking or baking more?  Why?
  8. What is your favorite TV show?
  9. What is your favorite food?
  10. What talent do you wish you had?  Why?
  11. List three things on your life bucket list.
Writing this post was really fun!  Thank you again Kelly for the nomination.  I'm looking forward to reading the answers, facts, and questions from the bloggers I nominated as well as discovering new blogs!

xoxo,
Heather

Wednesday, January 8, 2014

My First Layout of 2014!

Man, does it feel good to be making a layout!  After a bazillion Christmas cards, tags, etc. and my Christmas album (which is almost finished!), I really enjoyed doing something non-Christmas.

I was finally able to bust open my Citrus Twist November Darling Scrapbook Main Kit.  This kit has this gorgeous fuchsia streak throughout the month's selection.  And there is a little touch of the Pantone's 2014 color of the year:  radiant orchid.  And if you guys don't know, purple is my absolute favorite color.  When the 2014 color was announced, I was ecstatic!  I'm getting off topic...

As I was saying, I was really looking forward to making a layout.  I hadn't made a layout since the end of October/beginning of November.  

I've been browsing Pinterest a lot recently, especially for layout sketches for a project that I will be posting about in a few weeks.  I was loving all these sketches I had pinned and those I was seeing on various blogs.  I think I'd like to use more sketches as inspiration starting points for my layouts this year.  

Citrus Twist Kits Sketch by Kasia
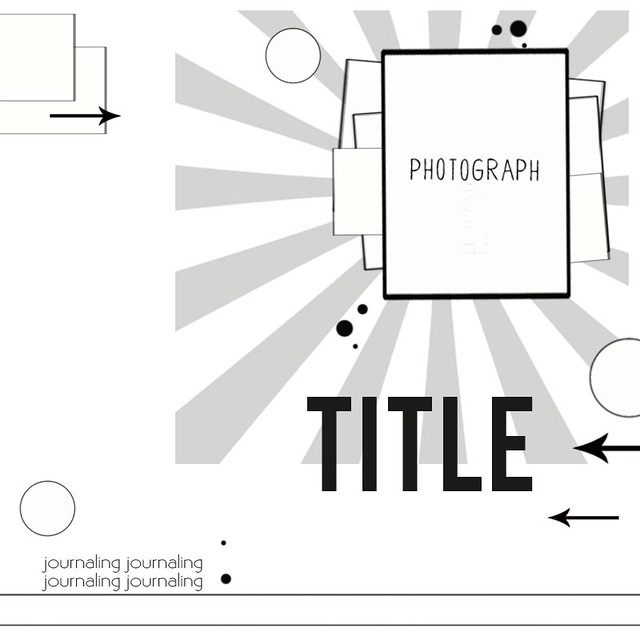
 I decided on this sketch I found on the Citrus Twist Kits blog from June 2013.  And here is my interpretation of this sketch.

Supplies:  royal blue textured solid color cardstock; Heidi Swapp Mixed Company-Good Life patterned paper;   Dear Lizzy Polka Dot Party-Polka Dot Plates patterned paper;  Heidi Swapp Mixed Company Ephemera packDear Lizzy Gold Soiree Glitter Foam Thickers by American Crafts;   Blue Corn Navy Alphabean Stickers by Jillibean Soup; washi tape; gold doily; fuchsia doily; sequins; glassine bag

Aren't the colors just beautiful?!  Everything I used is from the Citrus Twist November Darling Main Scrapbook kit (linked above).  The only supplies from my stash are the small piece of gray patterned paper (from a previous CT kit), the gold doily, the navy blue alphas, and the tag.  


I purchased a sun ray background from the Silhouette online store.  I resized the original to a smaller image and then cut it out on a different piece of patterned paper.  I then used that as a stencil to cut out the rays from my fuchsia patterned paper.  The image had a frame around it, and I didn't want that as part of my layout, so that's why I decided to create a "stencil" to still achieve the sunburst look.


As you can see from these photos, the only part of my layout that follows the sketch really closely is the sunburst image, patterned paper layers and placement of the photo.  


I love how I can start to follow the sketch very closely, but then I usually get so inspired and my layout becomes my own.  I love the bright, unusual color scheme for this layout.  It has definitely set the mood for my creativity this year!

xoxo,
Heather

Monday, January 6, 2014

My One Little Word 2014: DO


My One Little Word for 2014.  DO.  I am very excited about bringing this word into my life.  Something I will have to learn about embracing this word is not to let my life get too hectic.  DO, for me, doesn't mean I have to say yes to everything; DO every plan I think of; participate in every challenge/activity.  DO means for me that I will not be afraid to go after my dreams; I will just DO it.  I won't be afraid to succeed; I'll just DO it; I won't be afraid to DO what makes me happy; I will just DO it.  I want to embrace my life; I want to live my life.  I'm extremely blessed to be healthy, young, motivated, intelligent, I don't want to waste this amazing opportunity.  

I procrastinate...a lot.  I used to make new year's resolutions about not procrastinating, blah, blah, blah.  It never really worked out.  I think it's because I was focusing so much on that negative behavior:  procrastination.  That's all I thought about:  not procrastinating.  DO is such a positive spin on the stereotypical goal of not procrastinating.  

So, instead of focusing on all these behaviors or things I don't necessarily like about myself, I'm going to focus on what I can DO to make me an even better me.  

I've started a Pinterest board about my One Little Word.  Feel free to follow it, get inspired, get motivated, and just DO.

Here's to making the most of 2014 and to just DO.

xoxo,
Heather

P.S.--I will be sharing my OLW pages on my blog throughout the year.  I do not have a set schedule yet (i.e. weekly, bi-weekly, monthly), but it will be on a Monday.  Looking forward to sharing my journey with you all!