Pages

Showing posts with label cards. Show all posts

Monday, August 4, 2014

Make A Card Monday: A Multitude of Thanks

And here we are, another lovely week. I had a pretty relaxing weekend, at least compared to some more busy and chaotic weekends I've had as of late. Surprisingly, I'm welcoming the start of this week! It's another pretty week in my DIY Planner (a photo of which can be found here). That really helps to put an optimistic spin on a Monday.


DSCN2851

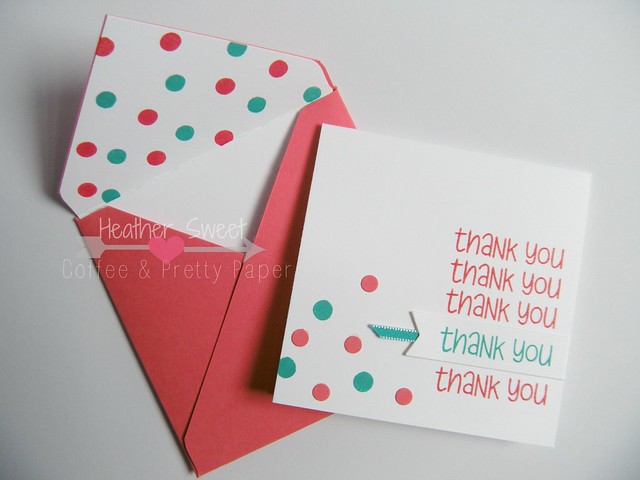
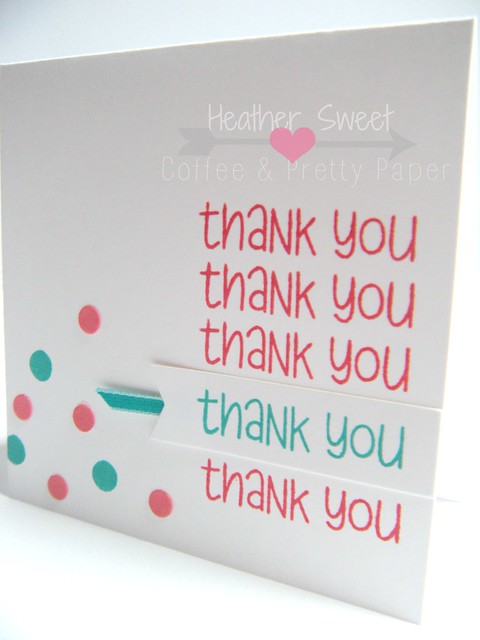
I am back with a super cute and easy square thank you card! It seems like I can never have enough thank you or birthday cards. This is something you can whip up really quickly and is perfect for assembly-card-making. It's also really simple to change out the sentiment.

How To

  1. Cut your white cardstock to 4" x 8". Fold in half, making the card a square at 4" x 4".
  2. Die cut a banner using white cardstock. Stamp the sentiment using a teal blue ink onto the die cut banner.
  3. Figure out where you want the banner with the stamped sentiment. This is important as it will serve as a focal point and a placeholder to stamp the additional, identical sentiments above and below the banner. Line up the straight edge of the banner with the edge of the card. Adhere onto card front. **Before you do this, make sure to adhere a thin piece of ribbon that coordinates with your stamped sentiment under the flag/pennant side of the diecut, making sure to extend the ribbon a little past the ends of your banner points. Again, this is to bring more attention to your focal point.**
  4. Once the banner is adhered, stamp the same "thank you" 3 times above the banner and once below in a pink stamp ink.
  5. Using a standard size single hole punch, punch small circles out of a coordinating pink cardstock. (Mine matched, as I was using Stampin' UP! products.)
  6. Sprinkle and adhere those punched circles in the opposite corner of your stamping.
  7. Using a similar size solid circle stamp as your cardstock circles, stamp a few circles in the same corner with a teal blue stamp ink. Make it a little haphazard or confetti-like.
  8. Envelope: Make using the We R Memory Keepers Envelope Punch Board-follow the measurements for an envelope that will hold a 4" x 4" card. I used the same color pink cardstock I used on the card.
  9. Envelope Liner: Using the same technique in last week's tutorial, I made the white envelope liner. That tutorial can be found here. On the envelope liner, I used the small solid circle stamp to stamp the confetti look in both the pink and teal blue found on the card.
DSCN2854 

Next week sometime, I will be posting a picture tutorial on using the envelope punch board to make an envelope and envelope liner. Stay tuned for that!

So, there you have it. I quick and simple thank you card! I do have to say, I really enjoy this square size. I will definitely be making more square cards. Too bad that weren't such a hassle to mail though. Won't stop me from making someone's day with pretty happy mail!

What unusual size cards have you guys been making lately? Let me know down below!

xoxo,
Heather

Supply List


Monday, July 28, 2014

Make A Card Monday: Hello My Friend

My goodness, I can't believe another week flew by! I'm back on what I hope will be a lovely Monday. Today, I have a very simple, clean, and quick card for you.

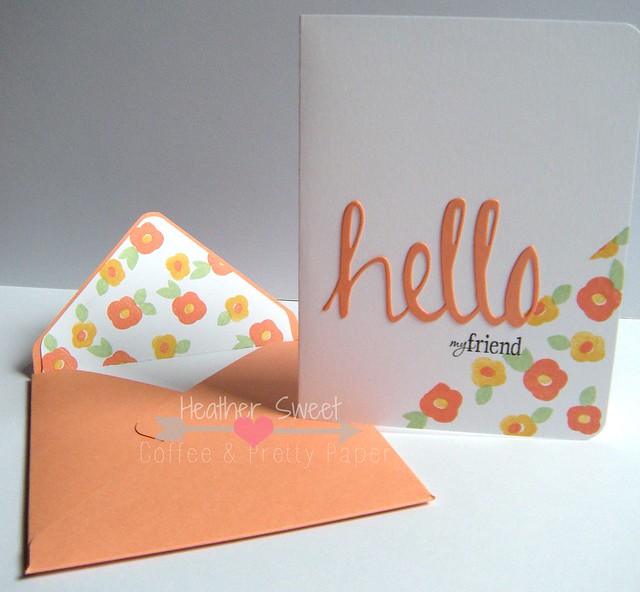
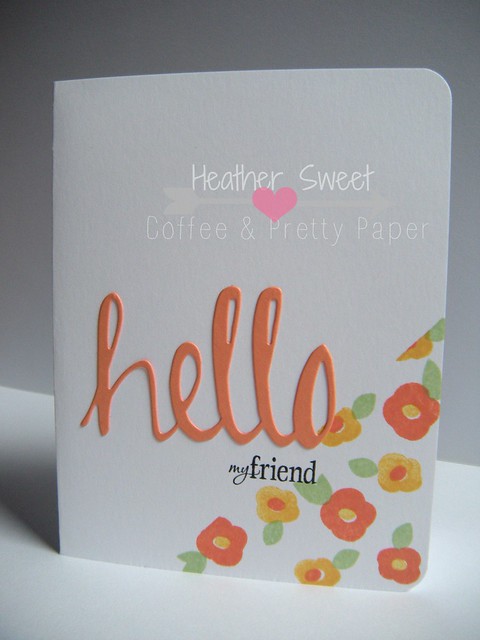
Hello My Friend Card

This card was so much fun to make! It came together pretty quickly after I figured out the colors I wanted to use.

How To:
The Card

  1. Cut your white cardstock (8.5" x 11") in half at 5.5" on the long side. This, of course, gives you two card bases. Fold one of the two pieces in half. My card measures 4.25" x 5.5". Round your corners.
  2. Take a piece of washi tape to section off the lower right corner of your card front. This is where you will be stamping the flower images.
  3. Using any small flower stamp image (I used Avery Elle's Oh Happy Day stamp set), stamp the flower a few times in the corner in one stamping ink color.
  4. Using another small flower stamp image, stamp this flower a few times in a coordinating stamping ink color.
  5. My stamp set-the Avery Elle set mentioned above-has a couple flower center stamp images. I used this flower center stamp to stamp a yellow center in the peach-y flowers and the peach center in the yellow flowers.
  6. Using a small flower leaf stamp, stamp leaves on each flower in a green stamping ink.
  7. Remove the washi tape to display that crisp "line" between white cardstock and stamped images.
The Sentiment

  1. Using a peach-y colored cardstock that coordinates with your peach-y stamping ink, die cut the word "hello." (The color coordination of the stamping ink and cardstock was simple, as I'm using Stampin' UP! products.) 
  2. Adhere the die cut "hello" towards the bottom of the card front, making sure to overlap the word slightly with your pretty flower corner. 
  3. I decided to add a little more to the "hello" sentiment. With another stamp, I stamped the additional sentiment, my friend, in black ink, right justifying this smaller sentiment below the larger "hello."
  4. Your card is done!
The Envelope

Hello My Friend Card

Using the We R Memory Keepers envelope punch board, I made my coordinating envelope for my card.
Hint: the WRMK's board does not have the measurement for the common card size of 4.25" x 5.5", but I have those measurements!

  1. Using the same colored cardstock you used to die cut "hello," cut a square 8" x 8". 
  2. Using the punch board, make your first score mark at 3.5", continuing to make your score marks around the square. 
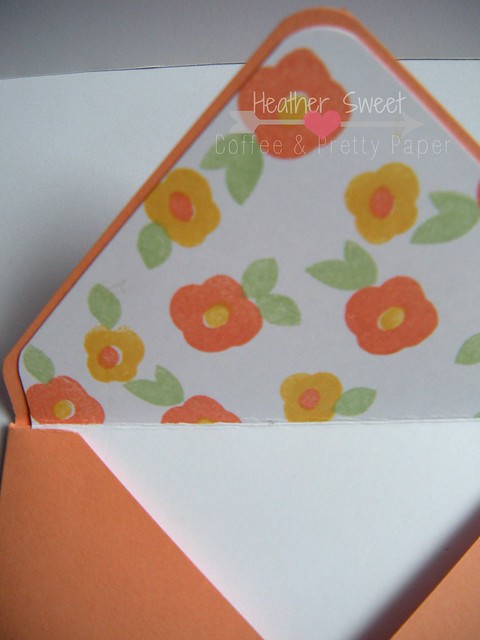
  3. To make the envelope liner, you're going to act like you're making another envelope, but with white cardstock. BUT, cut your square a 1/4" smaller than your envelope. In this case, cut a square 7.75" x 7.75". Still make the first score mark, using the board, at 3.5". 
  4. Depending on how you will have your envelope open, cut the side flaps of the white "envelope" off. Then you're left with the middle of the envelope (or the top and bottom). Cut this piece in half. This will give you 2 white envelope liners.
  5. I used the same stamps and stamping ink on the envelope liner as I used on the card, to coordinate the envelope even more with the card.

Hello My Friend

I hope these instructions made sense. If you have any questions, especially with the envelope liner (I felt that may have been a little confusing), just let me know in the comments section! Supply list is below!

xoxo,
Heather

Supply List

Monday, July 14, 2014

Make A Card Monday: A Thank You Card

Happy Monday! (I know, the "happy" is questionable.) Let's kick off the week with some lovely card inspiration, shall we?

One type of card I seem to be creating a lot, as well as never seem to have enough of, is a thank you card. This thank you card I recently created to go out with a Just Two Midwest Girls scrap challenge prize winner. But, this card design can be used to thank anyone in your life.

Thank You Card

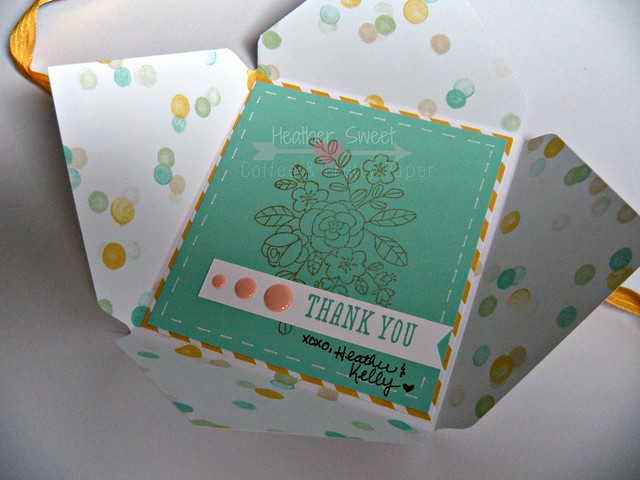
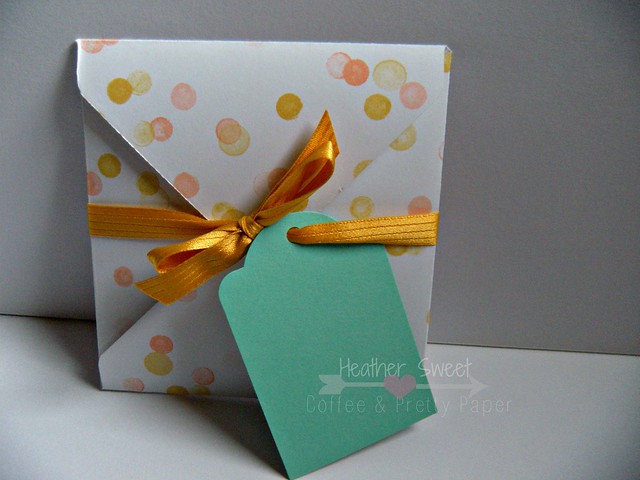
This card was really fun to make. I used my We R Memory Keepers Envelope Punch Board, which I LOVE! If you don't have one, definitely invest in one. I've been wanting to create this type of envelope card for awhile, but never sat down to make it happen. 

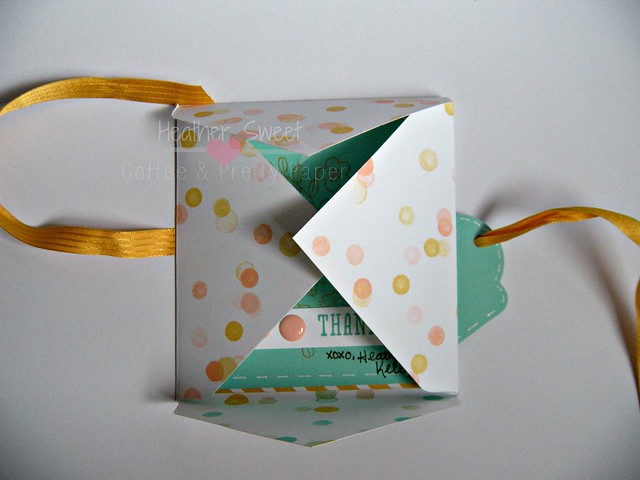
I made an envelope, according to the directions on the punch board, for a 4" x 4" card. Using the envelope I created as my card base, I layered my patterned paper and cardstock inside. On my cardstock, I stamped the flowers using a gold metallic stamp ink right in the center of my square. I stamped the sentiment on white cardstock and cut it into a thin strip to make a banner. I adhered that to my solid colored cardstock, layering three pink/salmon enamel dots on one end to balance the banner cut on the opposite end. Then, I added faux stitching along the edge using my white gel pen.

Thank You Card

Once the inside of the card envelope was complete, I used ribbon to keep it closed. The tag you see on the front holds my message to the prize winner. You can definitely add your message inside of the envelope. I was thinking of making my top layer of cardstock a flip up, adding the message on the next layer. I decided to use a tag on the outside instead. 

Thank You Card

So, the person receiving this fun and lovely card just has to untie the ribbon and open up the envelope to see the "card" on the inside. 

This card didn't take me long to create. I definitely see more cards like this in my cardmaking future! 

What new card designs have you come across lately? Anything you want to try or have tried recently? Let me know in the comments! 

xoxo,
Heather

Tuesday, July 8, 2014

Make A Card Monday...On Tuesday (Again)

You guys will have to forgive me. I had every intention of posting this yesterday (Monday), but I was struggling with the quality of the photo. Unfortunately, I had to use my phone to take photos of today's card. And, as it was being mailed out the day I remembered to snap photos, I had to work with what was available.

I need a new phone anyway; one with a much better camera. It is the camera I have on me AT ALL TIMES. I don't want the fact that I don't own a DSLR to get in the way of documenting my life and blogging. Again, I apologize for the quality of this photo.

Anniversary Card 002

This card was super simple to make. I sent this to my best friend for her wedding anniversary last week. I was already running late on creating a card for her and her husband, so I needed something that wouldn't take me long at all.

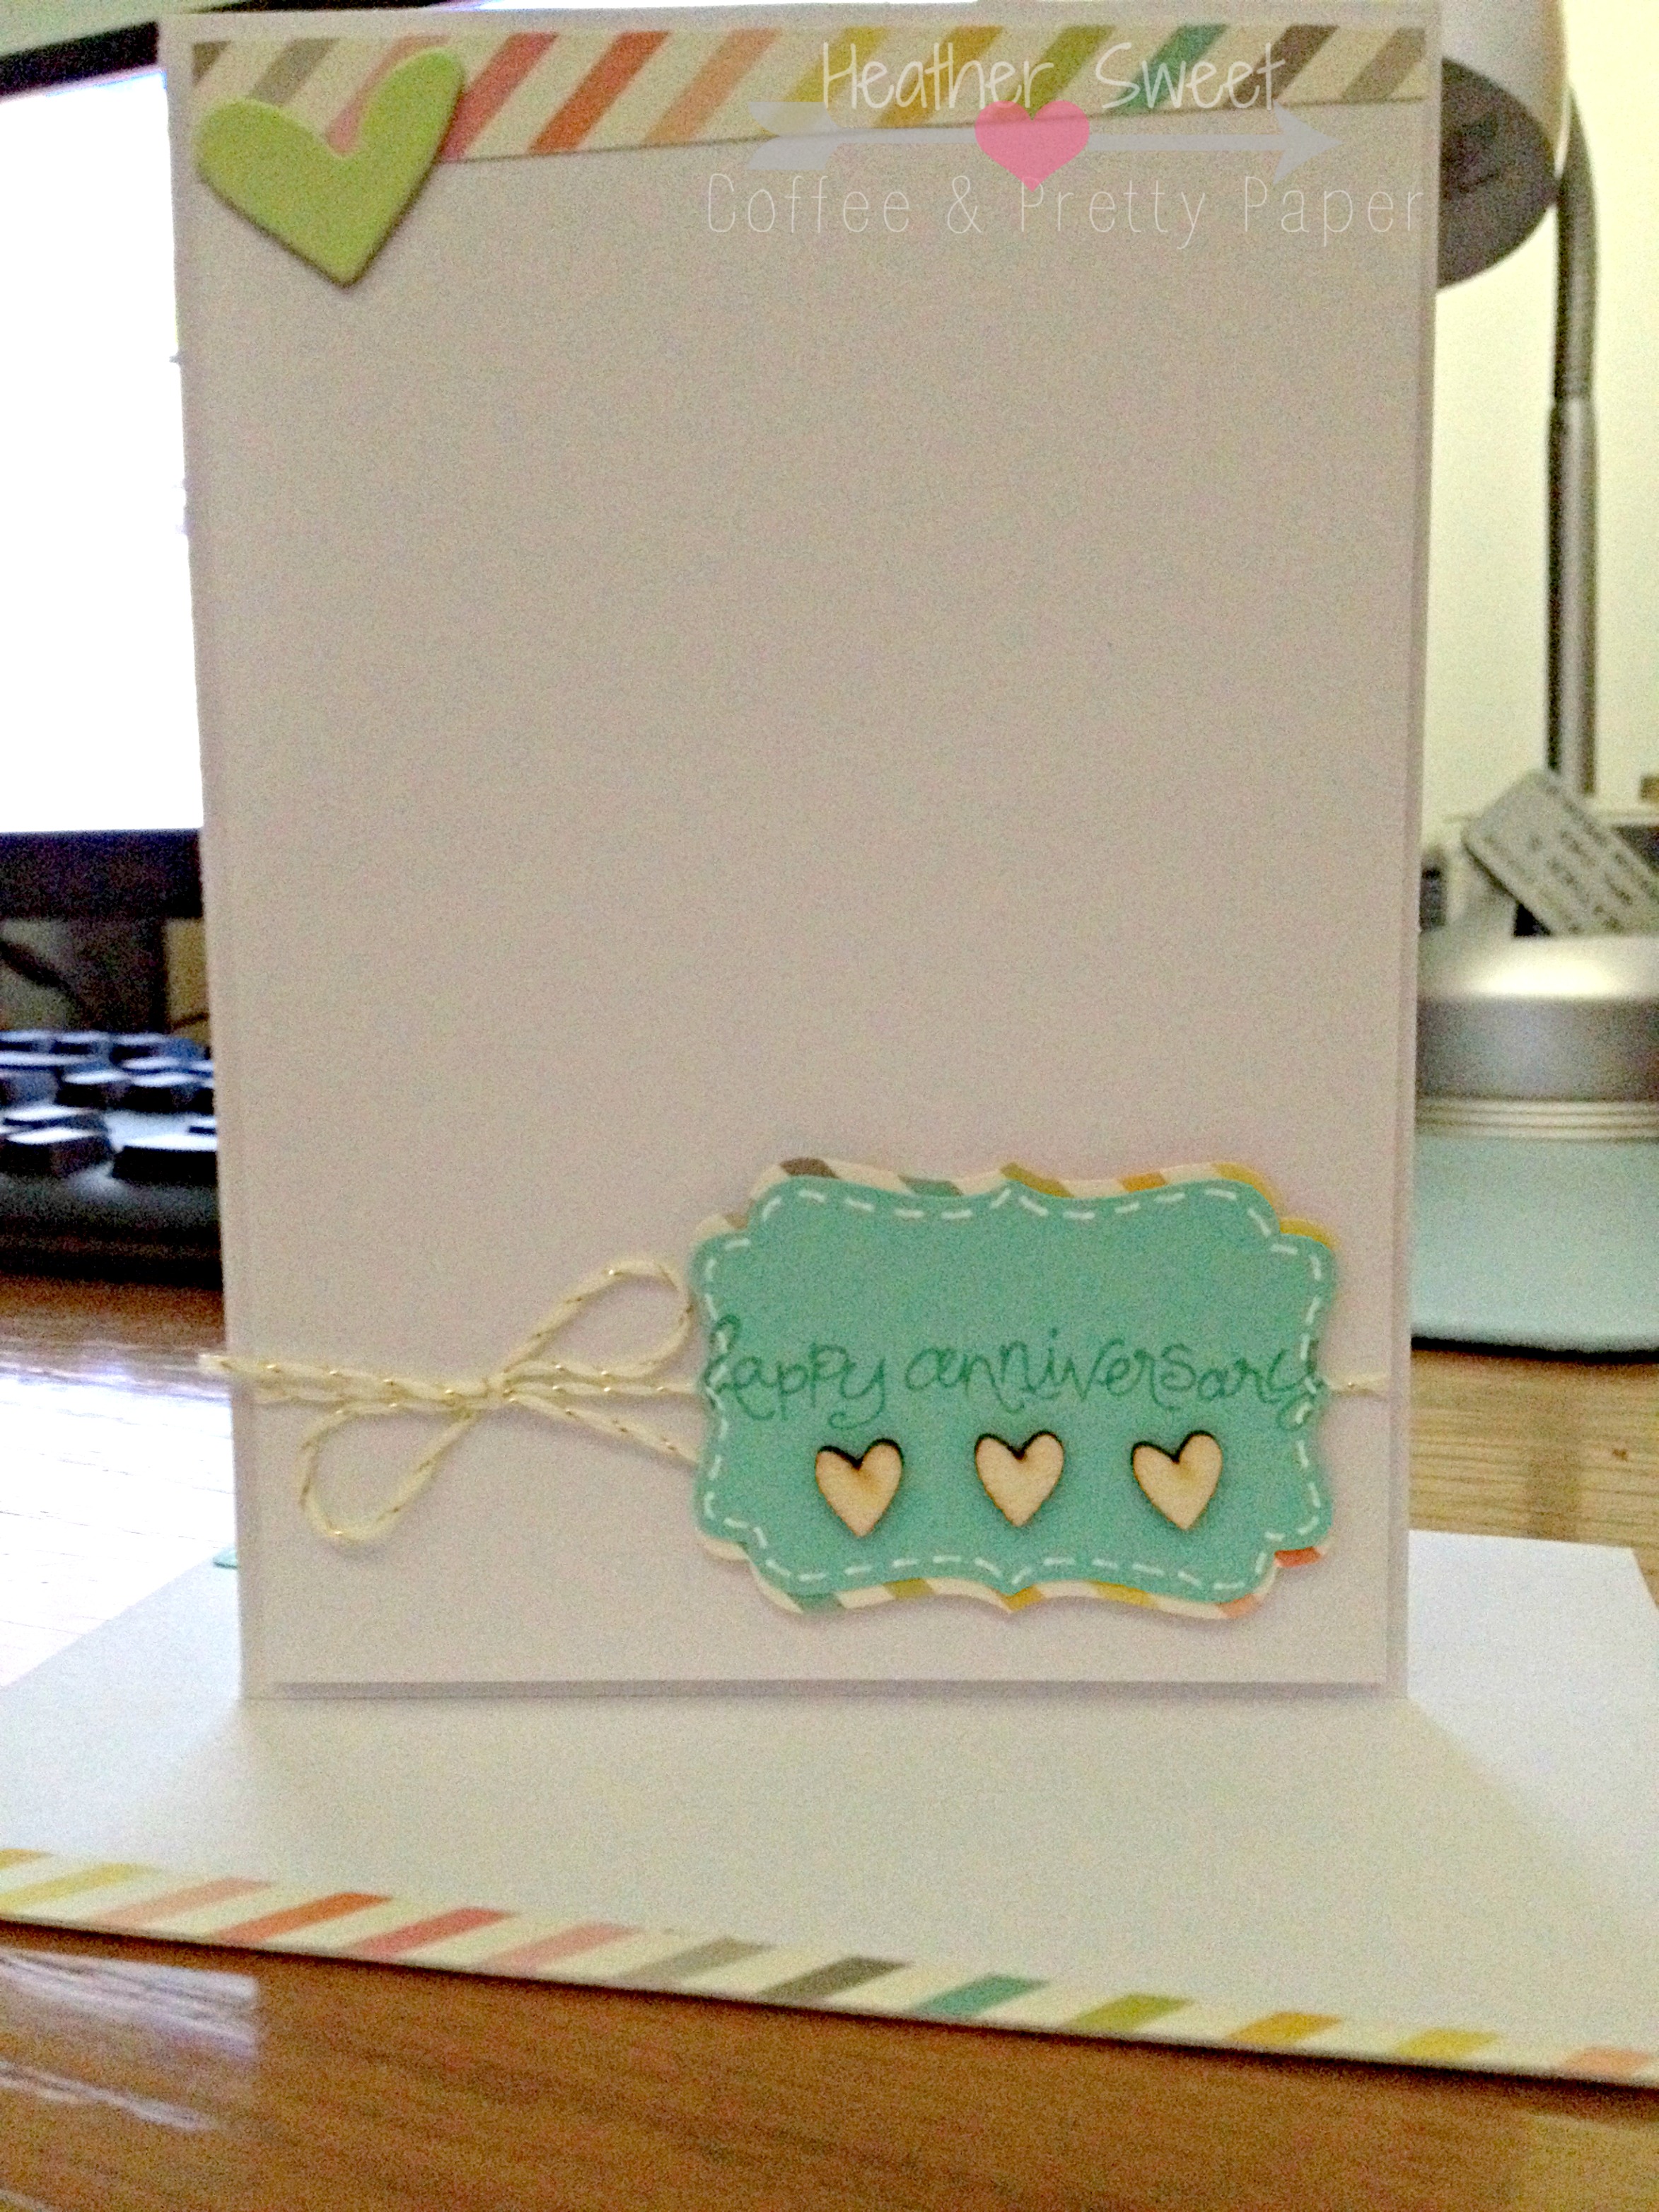
This is not my standard sized card. It measures at 3.50" x 4.75". This is from my stack of pre- cut and scored card bases with envelopes. The white card front panel is mounted on a white card base. I used a Stampin' UP! clear mount stamp set. Unfortunately, it looks to be a retired stamp set because I cannot find it on the website and I don't remember the name. 

The sentiment was stamped in Coastal Cabana stamp ink  onto it's coordinating Coastal Cabana cardstock. I then used the decorative label punch to punch out the sentiment. I added faux stitching to the edge of the label with a white Gelly Roll pen. I adhered three wood veneer hearts underneath the stamped sentiment on the label.

To bring more interest to the focal point, i.e. the sentiment, I wanted to add a subtle layer. I used this patterned paper from the older Simple Stories Vintage Bliss line, but from my 6" x 6" paper pad. I cut the patterned paper label in half to give the cardstock label a shadowed effect. Before I adhered the sentiment cluster to the card panel, I wrapped metallic gold and white twine around the front panel, tying into a pretty bow. I adhered the sentiment cluster with Stampin' Dimensionals.

There was still something missing on this card. I was flying by the seat of my pants, coming up with the design as I went along. In my head, I pictured a simple card with lots of white space, but it just didn't look right. I decided to add something to the top of the card. I took the same multicolored striped patterned paper and cut a 1/4" wide strip. I adhered the strip at an angle to the top of the card. At the last minute, I decided to add that light green, almost lime green chipboard heart. This decision was purely based on the fact that my friend's favorite color is a bright, lime green. The front panel was adhered to the card base with Stampin' Dimensionals as well.

The coordinating envelope isn't shown that well in the photo, but I adhered a 1/4" wide strip of the same patterned paper on an angle to the bottom of the front of the envelope. I punched a decorative label from Coastal Cabana cardstock to write the return address. That label was also outlined in white. 

Hopefully this card provides inspiration for something quick and simple. This design would be great for an assembly line type card construction, for any event, especially thank you cards. 

What is your favorite quick and simple go-to card design? Let me know in the comments section!

xoxo,
Heather

Tuesday, July 1, 2014

Make A Card Monday...on Tuesday!

Today, I will be starting a new weekly series: Make A Card Monday. Now, I am fully aware it's Tuesday when I'm posting this first installment; I did not have time over the weekend to get this post typed up, so I had to postpone it.

Engagement Photo 001

This past weekend, Mr. Sweet and I attended an engagement party for one of his good friends. As always, I made a card for the event. This is actually the first card I enjoyed making in a long time, well, a long time for me.

Engagement Photo 002

This engagement card was inspired by this pin on my Cards Pinterest board. And, this lovely patterned paper inspired the colors for this engagement card. 

Engagement Photo 003

I've also been getting better at decorating the inside of my cards as well. Although, that's a much harder feat than the card front! And, I've been paying more attention to coordinating my envelopes too. 

There's my first card in my Make A Card Monday series. Have you guys made any cards lately? Link up what you've made so I can take a look!

xoxo,
Heather

Wednesday, March 5, 2014

A Little Gallery Inspiration

I thought today I'd bring you all some scrappy inspiration from the Two Peas in a Bucket gallery.  We all love the well-known scrappers out there; there work is just gorgeous, but I wanted to highlight those other creative people that may not always get recognized.  Paper lovers like you and me.  

There are a TON of amazing projects in this gallery.  I'm only going to highlight some in this post.  I'd like to do a gallery inspiration post once a month.  I'll link up the project, the creator's personal gallery, as well as their blog (if they have one).  I think it will be a great way to "meet" other scrappers!  A lot of my inspiration comes from other people's projects, so I want to start highlighting those that catch my eye.

Life Moves Pretty Fast, created by 2Peas Member  Leslie Ashe
I LOVE this layout!  I, personally, do not scrap with white cardstock, but Leslie just makes this absolutely gorgeous! I like the kraft, gold, wood elements, and flair.  This layout is simple, but still uses lots of embellishments.  Also, the white cardstock is a wood grain texture!  I love the pennants/banners, the tag, and I'm pretty sure that is gold polka dot washi tape...LOVE!

lovely layers created by 2Peas Member limedoodle 
Do I really have to tell you why I like this card?  ALL THOSE LAYERS!!  And it's on a card without it being overwhelming.  I love the colors she used and that vellum tag just gets me all excited!  I literally am in love with every card she creates.  Check out her blog here.

Simply Adorable, created by 2Peas Member MichelleWedertz
I love simple, but gorgeous layouts such as this one.  I love the layers with the doily and the tag.  I like the pink washi tape.  And those mist splatters are awesome!  

Relax by 2Peas Member catherine brancieq
I love that this layout's main paper elements are pocket style journaling cards!  I'm always looking for new ways to use my bajillion Project Life cards.  And I really like the royal blue with silver.  And oh, those stars!  Love, love this layout.  Check out more of Catherine's projects on her blog (in French) here.

Daisy Frame  by 2Peas Member marilou64
I am always in awe when I see all the different decor pieces made by paper crafters.  And this daisy frame is just something else!  I see something like this in stores all the time.  And I could make that!  This piece is definitely inspiring and makes me want to put my Cameo to work to create some lovely spring decor pieces for my home.

All this inspiration makes me want to be at home creating and not at my day job!  Looks like I need to start planning out some projects and using up my stash!  I hope you found today's post just as inspiring and creatively motivating as I have!  I'll be back Friday with a Just Two Midwest Girls scrap challenge.  Remember, there's still time to link up your take on our color challenge.  Find all the details here.

xoxo,
Heather


Monday, March 3, 2014

Make It Monday: Watercolor Background Paper

Happy Monday all!  I'm starting a new series on my blog, Make It Monday.  It's inspired by Kristina Werner's Make A Card Monday video series on her YouTube channel.  My plan is to use this series to show off techniques and how I do them.  This will not be a weekly series, but more of an every other week post.  I plan to showcase all sorts of projects.  Today, I do have a card I made using a watercolored paper technique.  This card was inspired by Kristina Werner ; she's made a few cards lately using this technique.

**Warning:  Photo Heavy!**


I started out with my supplies:  kraft card base, blue cardstock, watercolor paper, Distress markers, and my craft mat.  In the end, I don't use the blue cardstock.  And the watercolor paper I haven't cut down yet.


I scribbled my Distress markers onto the craft mat.  I made sure that the colors didn't touch.  And I put each color in more than one spot, trying to disperse color all over my paper.


Next, I took my mini mister and sprayed water all over my Distress markers scribbles, until the color beads up.


I took my watercolor paper and smooshed it into my scribbles.  I wiggled it around a bit and swiped it across the color spots to get this...


It's so pretty!  I took my heat gun to it before I added more color to my paper.  


Here's my end result after a couple more times of smooshing the paper into some more color and drying the paper.


I wanted to die cut my sentiment using my own paper, so I found a "hello" sentiment in the Silhouette library.  If you're curious about the settings I used for this watercolor paper, I set my Cameo to the cardstock setting, but turned my blade a number higher because this paper is a bit thicker than regular cardstock.  It cut like butter!


And here's my finished card!  I hope you found this post helpful and inspiring.  Next time I try this technique, I want to try it with Gelatos.  I have more colors of those than Distress Markers.  The possibilities are endless!

I'm looking forward to this new series.  If you have any suggestions for me, let me know in my comments section!

xoxo,
Heather

Friday, February 28, 2014

Practical Scrappers DT Project: Birthday Cards

Happy Friday everyone!  Today, over on the Practical Scrappers, we're showcasing birthday cards!  And, in case you weren't aware, my birthday was yesterday (tons of birthday photos on Instagram @hsweet12), so I obviously had to participate.


Isn't this birthday card so fun and happy, not to mention, trendy?!  I tried a new-to-me technique with some new-to-me products.  I do not know many Distress products.  I have a few Distress ink pads and a couple Distress paints, but that's it.  I was not really a fan of them because I'm a bright scrapper.  But, after watching so many of Jennifer McGuire's YouTube videos, I knew I needed to start making the investment.  So, I went to my LSS and bought six new Distress markers.

This technique I'm pretty sure I saw on Jennifer McGuire's channel, but I cannot find the video.  She used Distress markers to "watercolor" over a white embossed background.  I definitely wanted to try this because 1) it looked fun, 2) it looked really pretty, 3) it looked easy, and 4) it's a technique that can be used for any background stamp to customize lots of cards. 


The embossing is not perfect, but that doesn't bother me too much.  I think it adds a fun touch.
I used this chevron background stamp I got at Michael's; their Recollection brand.  I heat embossed this stamp on watercolor paper (because you use a lot of water to get your color to spread and blend) with white embossing powder.  I then used my markers in ripe persimmon, squeezed lemonade, and picked raspberry.  I just scribbled each color over portions of the paper.  Then, I misted the paper all over with some water and tipped the paper to the side to let the extra water drip off.  I didn't tip it down because I didn't want the colors to run into each other too much.  I just wanted a nice blend of the colors.

I cut down the background panel because I didn't like all the extra paper around the image, so my card is a bit smaller than I 4.25"x5.50" card.  It measures 3 5/8"x4 5/8".  I stamped the birthday sentiment (So Much to Say from Lawn Fawn) with black ink onto white cardstock, cut into a pennant shape.  I adhered the sentiment onto a larger pennant shape cut from black cardstock.  I used foam dots to adhere the sentiment to the card panel.  The card panel is adhered onto a heavyweight card base.  I used black puffy paint to mimic enamel dots to "underline" the sentiment.  I didn't have black enamel dots and that would have been a lot to use.  Puffy paints are a great and inexpensive product to get that enamel dot look.  I bought a package of 15 puffy paint bottles at Walmart for $12 or something like that.  You just have to let them dry for a few hours.

Looking back at this card, I think I'll add some black stars in the upper right corner to give the card some more fun.

So, that's it for me today.  Go check out the Practical Scrappers blog for more birthday card inspiration.  There are a ton of lovely cards! 

Have a great Friday!
Heather

Friday, January 31, 2014

Just Two Midwest Girls Scrap Challenge: Be My Valentine!


Welcome back to another scrap challenge!  Our last challenge, scrap your goals, was won by Mandi!  She submitted her layout on our Facebook page (link found in my sidebar).  Take a look at her layout here.

Valentine's Day is right around the corner.  Kelly and I thought that with the day of love being just two weeks away, we thought we'd share some Valentine's Day cards.  Kelly was nice enough to send me half of the Carta Bella's Devoted collection that she won in a giveaway last year.  Now, those of you that have played with Carta Bella products before know how absolutely gorgeous their colors are.  I love how saturated the paper is and just adore the thick and textured patterned paper.

I unfortunately didn't get to play with this collection too much, but I did put together a few cards with the products.  Right now, I've been in a very simple card design mood, probably because I've been making a ton of Valentine's cards.


This envelope card didn't turn out how I envisioned in my head.  I should have stamped a sentiment inside instead of using stickers.


This is my favorite card I made with this collection.  It's a cute little mini card!  I've had this simple idea in my head for awhile and it was quick to make.  If you need to make a ton of cards, you can easily translate this into a larger size with larger hearts and there you go.


I made the envelope with a patterned paper from the Carta Bella line.  Everything else was from my Valentine's haul I did a few weeks ago.  My sister (as the social chair of her sorority) needed some cards to give to other fraternities and sororities on her campus.  I used this card design for the sororities.

So, there are all the cards I made with this collection so far.  I wish I had a little more time to play with the collection.  Play along with us!  Link up your Valentine's cards!  They can be new cards or past ones.  You can link your cards to my comments section below, in Kelly's comments section, or on our Facebook page!  Those that enter have a chance to win a $5 gift card to Two Peas in a Bucket.  You have until Thursday, February 13th at 8pm CST to play along!

Now, go check out Kelly's blog to see what she made!

xoxo,
Heather

Friday, January 24, 2014

The Season of Love-Valentine's Cards

Valentine's Day is just around the corner.  I don't necessarily love it, but I enjoy it purely for the colors and the opportunity to make cutesy paper crafts!  I love pink!  I'm not ashamed to say how much I love pink.  I'm really liking the pink and aqua combination we're seeing in papercrafting, as well as with Valentine's products.  

Today, I wanted to share with you all some of the supplies I'm using for my fun Valentine's Day cards and crafts.  As you all know, I have an Etsy shop-Sweetly Made Designs-and I have been really busy designing, making, and uploading cards for the season of love.  I'll share some of the cards I've made as well.

Supplies

Maybe it's because I'm new to the papercrafting world (less than 2 years), but I didn't have any Valentine-themed products (well, I had one older Stampin' UP! stamp set).  I have some heart stamps and some patterned paper that could be Valentine's-y, but that is it.  I knew before Christmas was even here that I would be purchasing some Valentine-themed products.

Crate Paper's Love Notes 6x6 Paper Pad
American Crafts Valentine 6x6 Paper Pad (found at Target)


Stamps from Michael's (except for the "how sweet...", which is from Hobby Lobby)

Simon Says Stamp Falling Hearts Stencil
Simon Says Stamp Filled With Love Stamp Set-Collaboration with Mama Elephant

Simon Says Stamp Filled With Love Dies-Collaboration with Mama Elephant
Cards

Celebrate Love Card
Isn't this card too cute?!  I love the white-on-white of the card front on the card base.  I used modeling paste with the fallen hearts stencil for the tone-on-tone texture.  The tags, from the Filled With Love stamp set, are stamped in Stampin' UP! Coastal Cabana ink onto heavyweight white cardstock.  The sentiments are from the same stamp set and stamped in Stampin' UP! Melon Mambo ink.  I then die cut the tags with the coordinating die.  The small hearts on the twine were punched with patterned paper from the American Crafts paper pad.  The larger, dangling heart was cut with my Silhouette from paper found in Target's $1 section and backed with red cardstock for stability.  I wrapped pink and white twine around the card front, stringing on the medium-sized hearts and tags along the way.  I tied the large heart onto a separate piece of twine and tied it to the line to make it more of a hanging "charm."  The tiny hearts were die cut from pink cardstock and pink and aqua glitter paper using the Stitched Journaling Card Die Set from Lawn Fawn.

It's a really simple, yet beautiful Valentine's Day card.

Truly Smitten Card

I really, really love this card.  I think it's because it's less involved than most cards I make.  I used Stampin' UP! Crumb Cake for my card base.  The large heart is cut from a page from the book I'm using to make my More Happy Little Moments book.  There is this large heart that comes in this package of Dear Lizzy Lucky Charms Bits that I have hanging around my scrap room.  I really like the pattern of this heart, but I've never used it.  But it's a great size for a large heart element.  I've been using it as a stencil or mask to cut a heart from different paper.  The typewriter stamp is stamped with Tuxedo Black ink onto heavyweight cardstock, fussy cut, and then adhered with dimensionals.  The tiny hearts are die cut from pink cardstock using the above mentioned Lawn Fawn die set.  I took my white gel pen to add faux stitching around the card front.  

There are just a couple of the Valentine's Day cards I have been making.  I still need to make Michael's card and the cards I'm going to send to family and friends.  I have a couple ideas up my sleeve.

Are you making Valentine's Cards or projects this year?

xoxo,
Heather

Friday, December 6, 2013

Just Two Midwest Girls Scrap Challenge: Holiday Cards!!


And....we are back with another fun challenge for you all!  We had three people play along with us for our Kill A Kit challenge.  All three readers had just awesome projects!  If you want to check out their projects, all three are linked in the comments section on Kelly's blog.  Drum roll please....the winner is...Heather Adams!  I used random.org to select the winner.  Heather (great name, by the way!), please email me at heather.sweet12@gmail.com so I can get you your $5 gift certificate to Two Peas.

This challenge round comes at the right time (funny how we planned that!):  holiday cards!  I love making cards!  I've definitely gotten back into my card-makin' roots in the past few months.  For those that do not know, I finally opened up an Etsy shop to sell my cards, which was a goal of mine for 2013.  You can browse my little shop, Sweetly Made Designs, anytime you want.  Bare with me on the storefront though, I'm completely behind in creating my holiday banner and getting more holiday cards up.  I'm a newbie, but I'm learning and will be ready for the next holiday seasons.

Anyways...back to the challenge.  As you know, from this post, I decided on the Christmas cards I would be making to send out to family and friends.  I do not even have those started yet, so I will not be showing you those today, but they are on my blog schedule for next week!

Enough of me talking, here are my cards!


Yes, these cards are in my Christmas tree!  I was experimenting a little with lighting and embracing the holiday season.  Forgive me if it's not your cup of tea, but I kind of like it.  This card is a gift card holder!  The card sits in the white fold inside.  This design comes from my Stampin' UP! club I belong to and it's super simple to make once you figure out the theme of your card.  I will post a tutorial on gift card holders this weekend or early next week.  So, if this is something that peaks your interest, do not worry, I will provide more details on another post.


This card would be excellent to send in the mail because of it's minimum layers.  I love the look of stamped white images on kraft cardstock.  It's just gorgeous!  This card could easily be made in mass production.  The only thing that would make the process a bit longer is having to heat emboss the "Merry Everything" sentiment.  So, I stamped various snowflakes all over my card front, cut a banner from vellum and heat embossed the sentiment in gold (LOVE LOVE LOVE GOLD), and then added a few gemstones to a few snowflakes.  Simple, but gorgeous.

I obviously did not do a good job with the lighting on this card.  Dang man dang!

This card is super simple to make!  I really like the look of Maile Belles' cards:  clean, simple, lots of white space.  This card was inspired by her style.  "dashing through the" is stamped in silver ink through the "SNOW" stamp.  It's so clever!  And the snowflake is punched from silver glitter paper using a Martha Stewart punch.  You could make a ton of these in 30 minutes.  I used this stamp set from Papertrey Ink.  There are some other words or phrases you can use along with the big "SNOW" sentiment.  


These are easily, my favorite holiday cards I've made this season.  I don't know what it is about them, but I am in love!  These can also be made in mass production, but it would take a just a bit longer to complete because of the white embossed wreath, the circle that is die cut from the middle, and the coordinating envelope (if that's something you're interested in doing).  I just sold a custom set of these (with various sayings in the middle of the wreath) on my Etsy shop.  People really love them!


And here is just a simple, mini holiday-themed "Thank You" card.  I have actually never written any thank yous for Christmas, but this year, I just may.  This cute, mini, square card is something I include in my holiday-themed orders from my shop.  

Okay, there you have it!  Lots of holiday card inspiration!  Don't forget, I will have a tutorial up soon on making gift card holders.  Gift cards are popular during this season and what better way to dress up one than with a handmade "home" just for that card!

Play along with us this time!  Link up your holiday-themed cards.  You have until Thursday evening, December 19th to link up your projects in my comments section or in Kelly's comments section.  Remember, those that play have a chance of winning a $5 gift certificate to Two Peas in a Bucket!

Now, go check out Kelly's holiday cards!  They are super cute and she has a little bonus project included in her post!

Happy card-making,
Heather